Monday, March 17, 2014

Tips for visiting the parks during pregnancy

     Less than a month after I booked mine and my husband's 5th anniversary trip to Disney World, we found out that our family would be growing by two little feet. Many people thought it was crazy to be going to Disney at 6 months pregnant, but I was more than excited! What a great opportunity to get some beautiful and unique maternity photos, and to just slow down and take time to enjoy the parks. I could not imagine any better way to celebrate!
     If you are thinking about planning a trip to the theme parks during your pregnancy, there are a few things you need to keep in mind. For instance, what attractions are safe and not safe to ride, as well as keeping well hydrated. You also need to keep in mind how far along you will be during your trip. Based on my experience, I would not recommend going when you are farther than 24-28 weeks along.
     Here are some tips for expectant mothers in the parks, as well as some tips on getting great maternity photos.


1. Pace yourself. As someone who is used to being there when the park opens and going hard all day until closing, I was in for a surprise when I had to try out more benches than normal. Don't be afraid to take a break when you need it. You will be doing a lot of walking, so sometimes a short rest is necessary to catch your breath. Because you will not be able to ride some of the more popular attractions, you will have extra time to sit and enjoy people watching.

2. Try new things. If you are a WDW veteran, this is a great time to try things you've never done before. For example, if there are less popular attractions that you have never experienced (because perhaps time didn't allow it), now is your chance to try it out. If you have odd cravings, now is also a great time to try to restaurants and quick service meals. We ate more than normal on this trip, and really enjoyed trying out new places.

3. Avoid certain attractions. Disney posts health restrictions outside all of the attraction ques. The ones that have an expectant mother warning are: Space Mountain, Big Thunder Mountain, the Barnstormer, Dinosaur, Expedition Everest, Mission Space, Primeval Whirl, Rock n' Roller Coaster, Splash Mountain, Star Tours, Test Track, and Tower of Terror. Kilimanjaro Safaris also has a pregnancy warning, however, after thoroughly researching why, I chose to ride it and was totally fine. The main reason for the warning is because of the bumpy roads. But if you're from a rural town like I am, you probably drive on roads every day that are much rougher than the safari. There are other rides that do not have a warning, but can make some pregnant women sick (if they are prone to it). These are rides like Dumbo, the Mad Tea Party, Aladdin's Flying Carpets, and anything that spins.

4. Drink plenty of water. This is especially true if you are going during hot weather. We were there just a week ago, so we had pleasant Spring weather that wasn't too hot. It's a great idea to carry a water bottle with you and refill it at the water fountains. This is a great way to save money, and Disney water is yummy.

5. Wear the most comfortable and supportive walking shoes you own. This applies to everyone, not just expectant mothers. I highly advise against wearing any type of sandal or flip-flop to the parks. You need shoes with good walking support, otherwise your feet, legs, and back will hurt much more than necessary.

 
Taking Maternity Photos in the Parks
     Disney is a perfect place to get unique photos! There is no shortage of beautiful spots around all four theme parks. Because we didn't spend as much time on attractions as we normally do, we had plenty of time to take photos. Here are some tips for doing your own maternity photos in the parks:
 
1. The classic shot in front of the park icon. The photos that almost everyone gets on every trip are the classic poses in front of Cinderella's Castle, Spaceship Earth, the Tree of Life, and the Sorcerer's Hat. All you need to do to make these maternity shots is to place a simple hand on the belly. This draws the viewer's eye to where your bundle of joy is being carried. There are always PhotoPass photographers in these locations. They will be happy to take a photo with your camera, as well as one with PhotoPass.
 
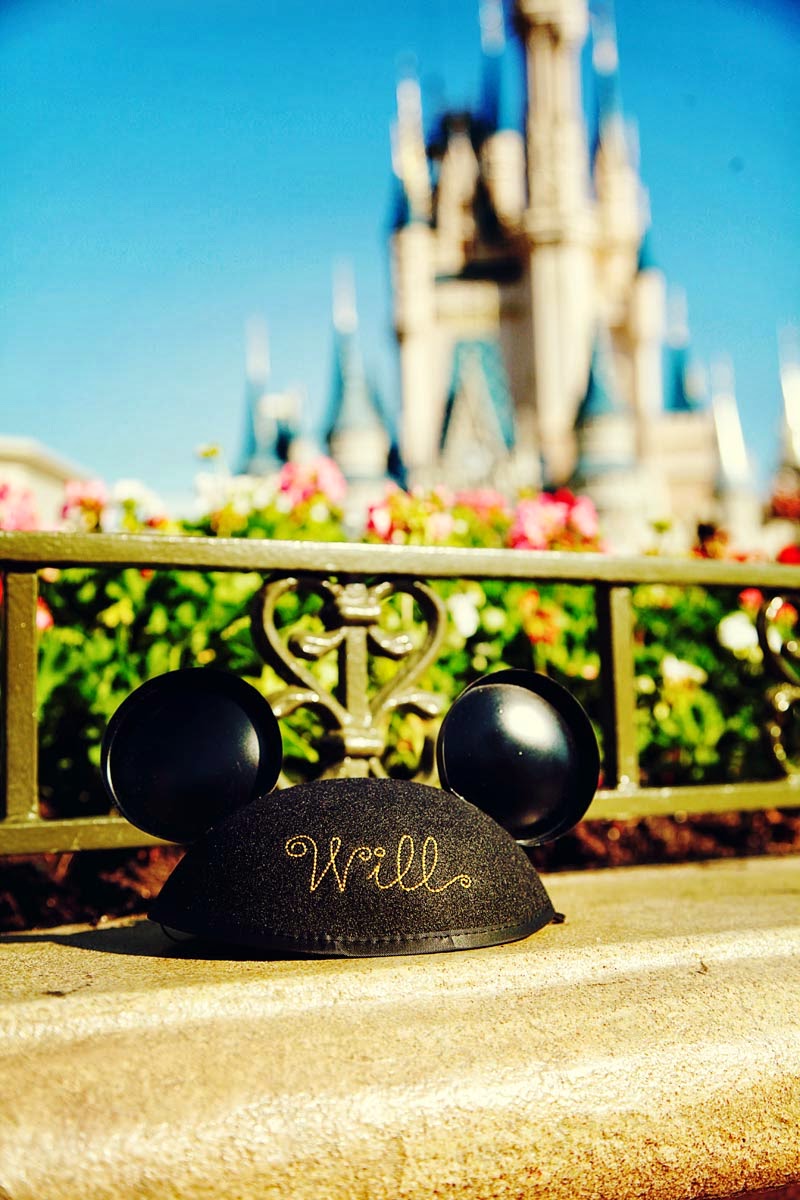
2. Use props. A pair of baby shoes, a sonogram photo, or even a personalized baby ear hat make great props for maternity photos. You can hold the objects, or place them in the image by themselves. Because we knew we were having a boy, we bought a personalized ear hat and placed it in various locations such as the Partners statue and the monorail, to have some distinctly Disney images.
 
3. Look for places off the beaten path. World Showcase at Epcot is a treasure trove of photo opportunities. There are tons of places to get great photos that don't necessarily scream "taken at Disney World." My favorite spot is the Morocco pavilion, underneath the archway and around the hidden fountain just to the left. Asia land in Animal Kingdom has lots of interesting walls and doors that provide a great texture for your images. In Magic Kingdom, use the castle wall or the archways in the entrance to New Fantasyland to create a classic look.


4. Meet the characters. Who doesn't love a classic photo with Mickey? Depending on how far along you are in your pregnancy, you can even get the characters to help you reveal the gender to friends and family, or even make the big announcement that you are expecting. If you plan to do that, be sure to bring a sign or something that makes your announcement, then just ask the character to hold it in your photo.
 
5. Posing. When doing maternity portraits, I always ask my clients to place at least one hand on their belly in every shot. This draws attention to the very purpose of the photo. You can place one hand on the top of your bump and the other underneath, or just one hand in either location. Also remember to take some shots that are just of the belly, keeping your back all the way to one side of the frame (like we did in the first image on this post). Leaning against a wall is a great classic pose that is very flattering to most anyone. Take a step or two away from the wall and lean back so that your shoulder blades (and not your entire back) are touching the wall. Take the foot that is farthest away from the camera and step in back toward the wall, letting your knees bend slightly. Keeping your weight on that back foot gives you a slimmer figure and really shows off that gorgeous baby bump (See the black and white image above). One last thing: don't forget to take some photos where you are looking down at your belly. This too helps draw the viewer's eye to the focus of the image.
 
     I hope you can find these tips to be helpful on your trip. Don't be afraid of visiting the parks during pregnancy. If you and baby are healthy, there is no reason why you can't have just as much fun as you always do. I loved it so much, that I hope I am able to visit during any future pregnancies!
 

Taking your Toddler to the Parks

     Ever since we found out we were expecting a baby this summer, I have been planning his very first Disney trip. Is it a bit too early? Never! Planning a trip with a little one is a bit different than planning a trip with all adults, or even with older kids. Does that mean you are limited in what you can do? Absolutely not! Disney does everything possible to make bringing your toddler as pleasant and smooth as it can be. After all, this place was built for families right?
     In this post, I'll be sharing a few tips and tricks for visiting with toddlers. Keep in mind that my first trip with my own toddler is still about 3 years away, so most of these tips actually come from my mom, who is a pro when it comes to wagging a little tyke around the parks, as well as my own experience actually being a toddler at the parks. (Yes, I remember it very well!) So without further delay, here are my tips for toddlers!


1. What age is the best time for a first visit? This question is one I get asked a lot. The answer is different for every child, depending on their imagination and attention span, but the general rule is anytime after they are potty trained. For most children, this is around 2 or 3 years old. I was 2 1/2 when I had my first visit. My son will be the same age. Some people think this is too young, using the excuse that the child "will not remember it," but this is just what it is: an excuse. I remember every detail of my first visit to the Magic Kingdom (in fact, it's my first vivid memory of life period). Memory is no reason to wait to take your child to the parks. Even if they don't remember it when they are 2, you will. You will remember the magic and light in their eyes during every first moment. That magic dims a little more the older they get. Children age 6 or 7 are not nearly as compelled to believe in make-believe as younger ones. Besides, don't think that you are only going to take your child once in their life. You will probably revisit the parks again and again as they grow.

2. Use a stroller. If you don't think it's worth it, just ask my mom. On my first trip, they opted not to you a stroller for just one day and totally regretted it. There is an insane amount of walking involved in a Disney trip and toddlers will want to be carried for most of it if they are not riding in a stroller. You can bring a stroller from home, or you can rent one from Disney. There is much debate over which option is better. As with anything, it depends on what's right for your family, so I will simply share with you what we are planning on doing. After watching countless tired parents having to lug their big strollers on and off trams, monorails, buses, and boats, it was a no-brainer for us to rent. You can rent single strollers from Disney for just $15 per day (double strollers are available for $31 per day), or you can rent them for the entire length of your stay for $13 ($27 for doubles) per day. Strollers cannot be removed from the parks (a blessing, trust me), so when you are finished at one park and ready to go to another, all you do is return your stroller, go to your next park and show your rental receipt and they will give you a stroller to use there. Easy as that, and great for park hoppers. If you bring a stroller from home, you will be required to fold it every time you get on a tram, bus, or boat. Monorails do not require folding. Every attraction has stroller parking nearby.

3. Get the Park Hopper option on your ticket. This is another one of those things that people debate over. Some say it is a waste of money, but others (like me) couldn't live without it. It's especially handy if you have a toddler. Why? Naptime. If your toddler (or you lol) needs a break to rest during the day, with Park Hopper you can return to your room for a few hours, then head back to the parks later without having to use another ticket day. Park Hopper also allows you to maximize your time and do what you want, when you want. You are not limited to remaining in one place the entire day. With toddlers, variety is a very good thing!

4. Take small snacks. Disney allows you to bring your own food and drinks to the parks (but no coolers), so pack a small baggie of your child's favorite snack to hold them over between meals. You also might want to carry a couple bottles of water. Once your bottle is empty, you can refill it at one of the water fountains. We did this on our last trip and it was very convenient and saved us the extra drink money.

5. Don't push character greetings. This tip comes from a very scared little girl who really did NOT want to meet Tigger as much as he wanted to meet her. Not all kids will love to talk and play with the characters right away. On my first visit, my parents tried to get me to interact with characters like Tigger, Mickey, and Minnie, but I was very shy and scared of them. I was not expecting them to be that BIG! I loved watching them from a distance, but up close meet-and-greets were not my thing yet. I didn't really enjoy the characters until I was 5. Not every child is this way of course. Your child may love the characters. But if they don't, don't try to push it. I know how much you want that classic photo with Mickey, but sometimes you just have to wait until they are ready to come out of their shell.

6. Staying away from loud noises. If your child does not do well with very loud noises, like fireworks, try viewing the show from farther away than normal. At Magic Kingdom, most crowds gather around the statue and hub area in front of the castle. Most people don't realize there is a perfect viewing area from the second level of Main Street Train Station. This is far enough away that the booms aren't so loud, but is still a great view of the entire show. At Epcot, try viewing Illuminations from anywhere on World Showcase. No crowd and a more spectacular view.

7. Rider Swap. Just because your little one is too small to ride the rollercoasters doesn't mean you have to miss out. Disney offers something called Rider Swap. One parent gets in line to ride the attraction and is given a ticket. After they ride, they come back and give the ticket to the other parent who then rides with little to no wait. This way, one parent is always waiting outside with the child. This is very similar to doing the single rider line, which is a super fast and great way to ride the big attractions like Rock n Rollercoaster, Tower of Terror, Expedition Everest, and Space Mountain.

8. See it through their eyes. Don't forget to take an opportunity to see things from your toddler's level. For example, when watching a parade, crouch down to their height and see it from their view. Some of the things you may think are annoying or cheesy are absolutely inspiring to them (ever heard of It's a Small World?). Take the time to enjoy those magical firsts. You won't ever get them back.

Friday, March 14, 2014

Booking a photo session with Disney Photography


     Many people don't realize (even I didn't until a couple years ago) that Disney offers one-on-one professional portrait sessions at the theme parks and resorts. Being a portrait photographer myself, I was super excited to book an anniversary/maternity session for my husband and I during our trip this week. We haven't had professional photos made in 7 years!
     Compared to what I charge for portraits (and what others charge in my area), these sessions are very expensive. However, we were so extremely pleased with our images and the entire experience that I would say it is well worth every penny.


Portrait Session Options
     There are two different types of sessions available: The Mini Portrait Session and the Enhanced Portrait Session. Each type offers different locations and pricing. Here's a closer look at each:

Mini Portrait Session
The Mini Portrait Session is the least expensive option. It is $150 (plus tax) and includes a 20-minute session at one of these Disney resort hotels: Polynesian, Grand Floridian, Beach Club, Art of Animation, or Animal Kingdom Lodge. (Theme park locations are not available for these sessions.) At the end of your session, you will sit down with the photographer and view the images on an iPad. You will also receive a flash drive of all the images with copyright releases. These images are straight out of the camera, with no editing whatsoever. If you know someone who can edit them professionally, this is definitely a great value. Here's a side-by-side comparison at the original Disney file and an edited version:

The number of images varies for each session, but ours ended up being about 72. However, there are several duplicates of each pose. In reality, after I edited them, we ended up with only about 20 different poses. While there is not time for outfit changes, you are welcomed to bring props and ideas. We had an ear hat personalized with our son's name that we used for some shots. The entire process, from shooting to viewing, takes about 30-45 minutes.


Enhanced Portrait Session
The Enhanced sessions are more expensive than the mini sessions. The $350 (plus tax) price includes a one-hour session at your choice of any of the resorts, or even Epcot World Showcase during certain times of the year. It also includes a 6x6 proof book and website posting with slideshow. Images from these sessions are professionally edited by Disney. In addition to the main photographer, there is also an assistant and professional lighting equipment present during your shoot. The downside with this session is that no prints or files (except the proof book) are included in the price. All that must be purchased extra. Disney offers four different print packages ranging in price from $75 to $300. You can also purchase large prints (size 11x14 to 24x30) from $120 to $275 each. It isn't listed on the website, but I have read from other Disney bloggers that a CD of the images is available for $100. Looking at Disney's pricing model, this seems extremely cheap so I'm not sure how true this actually is now.

What time should you schedule your session?The best time for a photo session (Disney or otherwise) is during what photographers refer to as "golden hour." This short window of perfect light only occurs during the morning at sunrise and in the evening just before sunset. Our session was at 8 a.m. and we hit morning golden hour perfectly! We were still at the hotel when the session after ours began around 9 and the lighting had already dramatically changed.

How far in advance should you book?
To get the best time slot at your preferred location, i
t's best to book at least 3 months in advance. If you are going during a busy time (such as Spring Break, summer, or Christmas), you will probably need to book much earlier. I had originally wanted a sunset time, but when I called to book (3 months before), the only availability at our choice resort was the morning slot just two days before the end of our trip. This also brings us to another reason to book early: You will want to do the session as early in your trip as possible (within one to two days of arrival). If you wait until the end of your trip, like we did, everyone will be tired and not in the mood for pictures.

What should you wear?
This can depend on your location, but generally keeping it simple is always the best way to go. Avoid shirts with large logos or writing, or very bright neon colors. Decide whether you want something casual or dressy and keep everyone's outfits in that style. Once you decide your location, look up photos of the area online to be able to see what colors would look best with your setting. We chose the Grand Floridian which is mostly white and rust colors. I decided on a navy dress for contrast, and my husband wore a white button down with khakis, which seemed to compliment the scenery well.

Which type of session is best for small children?
If you are planning a family session with small children, it may be best to do the Mini Portrait Session. As a children's portrait photographer, I can tell you from experience that a child's attention span for photos is very short. They will not be nearly as excited or interested in getting them done as you are. The 20-minute session is a perfect amount of time to get great images before the little ones start getting bored.

     I'll leave you with some more (edited) images from our session. If you want to see more examples at different locations, you can visit the Disney Fine Art Photography website and browse through their galleries.


Thursday, March 13, 2014

Disney Magic Band and FastPass+ review

     When Disney first announced the coming of Magic Bands, I was a little more than skeptical. The current system of key cards and paper FastPasses seemed to be working just fine, so was a total overhaul of hotel rooms, park entries, and FastPass kiosks really necessary? But Disney has always loved to be one step ahead of the rest of the entertainment world when it comes to technology, so they were going there whether their fandom approved or not (and most of us did not). This new system got rid of paper tickets or “Key to the Kingdom” cards. Instead, each guest is given a personalized Magic Band months ahead of their vacation which acts as their theme park ticket, FastPass, hotel room key, and credit card. In reading the first reviews and articles, it made me weary to think that anyone, even the company that I trust most, would have that much of my information all stored in one tiny place. When I booked our fifth anniversary/maternity trip for this past week, I was hoping I would have the option to forego Magic Bands (as the system is officially still in testing phase). Alas, the choice wasn’t there, so try Magic Bands we did.
    
I’ll be honest, after the first day I was fully prepared to write a huge post about how we were right all along and this was the dumbest thing Disney has done since turning Cinderella castle into a giant birthday cake. But by the last day of our trip, I was conflicted and confused. To put it shortly, Magic Bands and I have a love/hate relationship. Let’s start with the obvious: the hate part.


Magic Band Cons

They are quite uncomfortable. The bands are made of a plastic/rubber material and are waterproof and durable. The fastening mechanism is kind of like the one on those old trucker hats, with the prongs and holes. The way it’s made, it is a little difficult to put on one handed. The hard, inflexible area where the microchip sets, is about an inch to inch and a half long. This makes the ends of the band point down toward the center, creating a triangle shape that does not conform to the oval shape of your wrist. Thus, the band is quite annoying to wear. After entering the parks, we took ours off and put them away in the bag. We noticed a lot of other guests doing this too, and hardly anyone was actually wearing theirs. (Isn’t this exactly the thing that Magic Bands were supposed to save you from doing? Having to get your tickets in and out of your bags or wallet? Hmm...)
They don't always read correctly. This happened to both of us multiple times throughout our trip (to me, so much that mine had to be reset). If your band works properly, the Mickey symbol on the scanner will light up green (blue if it does not go through). We had issues getting into the parks at times (never at our hotel or with FastPass+). It often happened as we tried to enter our second or third park for the day. It would work fine one time, but the next it may take 3 or 4 tries before it would go through. I have no idea what could be causing it, whether it was something we were doing wrong or the bands themselves.

It's all in one. You lose your band, and you've lost your ticket, your FastPasses, your hotel room key, and a credit card. That just makes me nervous. Because we didn't want to wear them, it was harder to keep up with our bands because they can't just slide into a wallet like a card.
 
Magic Band ProsFaster entry to the parks. The introduction of Magic Band meant that all turnstiles were removed from the park entrances. Now, all that is there are the band scanners. There are two scanners per line (think of it like a gas station with multiple pumps). When the bands are working properly, it creates a much smoother and faster traffic flow into the park. It was amazing how much quicker we got in, even with long lines at park openings.
It's all in one. The very thing that first made me iffy about these bands is also one of the great things about it. In theory, it really is much more convenient to only have to keep up with one "key" if you will. You don't have to worry about keeping up with a hotel key, park tickets, and paper FastPasses individually. I'm just not sure a bracelet is the best thing to replace it all with. 
 
     I've mentioned before that I do not use FastPass. Because so many people do use it, standby lines have become much shorter and (if you know how to time things) FastPass is unnecessary. With the introduction of FastPass+ rules limiting the number of passes you can obtain per park per day, it means that standby lines are slightly longer than they have been in recent years (at least at busy times like Spring Break). With the new FastPass, you can only get passes for 3 attractions in each park per day. That means you will spend the rest of the day in standby lines for the other attractions. You can book your passes up to 60 days before your vacation via the My Disney Experience app on your phone or on the WDW website. You can also book them at the parks the day of, by visiting one of the new FastPass kiosks (right now these kiosks are just cast members with iPads in different areas of the park). I had no intention of using FastPass+ on this trip. The first day we were there, at Animal Kingdom, the FastPass return line was much longer than the standby line, further convincing me that FP was unnecessary. However, when we had ridiculous wait times at the other parks, we decided to give it a try. This is what we discovered:
 
FastPass+ Cons
You will spend all your time in line just to get your FastPass. Some of the longest lines we saw all day were the lines for the FastPass+ kiosks. We had already ridden three or four attractions before some people even had their passes. If you are going to use FastPass+, I highly recommend booking them using the My Disney Experience app. Otherwise you will not be accomplishing any kind of time-saving. I booked ours in less than 10 minutes on my phone while waiting in line for the Haunted Mansion.
It is only productive at certain times. As I mentioned earlier, we were at Animal Kingdom on our first day and noticed that the FastPass return lines were much longer than the standby lines. We were there from lunchtime until close and this was consistent throughout the entire time. FP is now offered on most every attraction, but is really only useful for a handful. The rides that they come in most handy for are: Rock n' Rollercoaster, Tower of Terror, Toy Story Mania, Peter Pan's Flight, Space Mountain, Soarin, and Test Track. All others tend to have comparable standby times.
You're day revolves around your FastPass. We did a lot of waiting around for our FP time to arrive, often standing right outside the attraction, but not being allowed to go in. Your time must be right on the dot, not one second earlier, before you are allowed to enter. Our return times for the different attractions did not permit much time to do anything in between them, especially since all the attractions were often on totally opposite ends of the park. Backtracking can sometimes be very unproductive and tiring (plus I can't stand being on that tight of a schedule).
 
FastPass+ Pros
You can save major time on certain attractions. Our biggest time gain was on Peter Pan's Flight. The standby wait was 45 minutes. We were on and off the ride in 7 minutes with our FastPasses. This will probably be the one ride that I will use FP for from now on. The other two attractions we had passes for  had reasonable standby times (less than 25 minutes), so we really didn't make up a lot of ground there.
The FastPass limit makes the system much more productive. The one thing that most people hate about the new FastPass+ is one of the things I like most. The biggest reasons standby lines back up is because there are too many FP people "breaking" line. With the new limit, we noticed these interruptions in traffic flow were much fewer, thereby making the line move faster than the posted wait time. The sign may have said 20 minutes, but we really only waited 10 or 15. It also means that you can't be as dependent on FP as before. I've seen too many people use FP as a crutch. They think that if they can't get a FP, then they can't ride it or it's not worth it. But they are missing so much! Sometimes the standby que is the best part of the ride. For example, the que line for Haunted Mansion is incredibly interactive and fun (it was even before all the upgrades. I loved reading the headstones). There are so many things to look at and play with that you don't feel like you're waiting at all. These elements also add to the story of the attraction. If you use the FP line, you miss every bit of it.
 
     Although Disney has been testing this new system for a while (almost a year I believe), there are still a few bugs that need to be worked out. It does, however, have a ton of potential. I guess, in the end, you could say that I'm not as against it as I was before. I see what they are trying to do, and I think the theory is a good one. Perhaps some changes need to be made in the execution, but that's what testing is for. The parks have changed tremendously just in the last 5 or 6 years. Crowds are much heavier than they have ever been (aren't we suppose to be in a down economy at the moment? Can't tell it!), and the next generation expects everything to be digital. Disney has always prided itself on adapting to a constantly changing world (one of the reasons they are so successful), so perhaps this really is the best way to, as Walt said, "keep moving forward."
     Overall, a grade of a B- from me!


Tuesday, September 24, 2013

Disneyland: Day 1

Wednesday, September 11, 2013
Disneyland: Day 1
The first thing I noticed was that California does not rise and shine as early as Florida. Both Disneyland and Disney California Adventure park did not open until 10 a.m. that morning, so we took the extra time to have a leisurely breakfast at the local Carl's Jr. (a.k.a. Hardee's). Even after taking time with breakfast, and making the 20 mile drive from our campground to Disneyland, we still arrived extra early (apparently) for California time. The parking lot wasn't even open yet. Weird. Anyway, parking was essentially the same as at WDW, except that at Disneyland you are able to leave the lot at any time, come back, and still park in the same spot as when you first arrived. Every vehicle is given a parking pass like this:
You just circle the lot, section, and row that you're in and when you come back just show it to the attendant. Pretty nifty, huh?
At Disneyland there are only two parking areas for the entire property: The Mickey and Friends parking deck and the Toy Story lot. The first day, we parked in the Toy Story lot. We had to take a Disney bus from the lot to the esplanade, or main entry area for all parts of the Disney property. That's the other weird (but pretty neat) thing about Disneyland: everything is a less than a minute walk from each other. The esplanade connects both theme parks, as well as the Downtown Disney area. There is only one bag check (just before you enter the esplanade) for both parks. All ticket booths are also in the esplanade.

The scanning and using of tickets was different too. Of course that could just be all resorts, as Disney is in the middle of changing the way you enter and purchase throughout the parks. We each had to have our photo taken, and our tickets were always scanned twice: once before the turnstile and once at the turnstile. No fingerprinting like we were used to at WDW.

 
Is this not the sweetest thing??


Walt had a personal apartment above the firehouse. He spent many nights in Disneyland with his family. Now, a light is always kept burning in the upstairs window in his honor.

The wooden Indian on Main St. WDW doesn't have one of these. It was on my "I have to photograph this" list.
 
Even though it was before 10 a.m., some things in the park were already open. There was no opening ceremony at Main Street Station, we just walked right on in. We swung by City Hall to pick up our "1st Visit" badges before moving on down Main Street and toward our first attraction. I've never been so excited about a button in all my life.


As we made to go over the bridge to Adventureland, we finally saw that the park wasn't quite entirely open yet. We had to wait a few minutes until the clock struck 10 before we could head to our first attraction: Indiana Jones Adventure. In WDW, Indiana Jones is a stunt show, but here it is a thrilling dark ride. It was AWESOME!!
From there, we headed to Pirates of the Caribbean next. While it does share a lot of similarities with its WDW counterpart, Disneyland Pirates blows the WDW version out of the water. You can tell that this version was definitely designed by Walt himself. In fact, it was the last attraction he ever worked on. For example, check out how detailed this scene is. You won't find it in the WDW version.
 
Disneyland's Pirates is located in New Orleans Square (WDW has Liberty Square). I fell in LOVE with this area! It puts you right in the middle of the French Quarter in New Oreleans (but much better). The main thing I wanted to see here was the Court of Angels. It's one of the very rare quiet spots in the park that is famous among Disney fan photographers. Sadly, it is being removed in order to expand the mysterious Club 33. I'm just thankful I got the chance to photograph it. It is beautiful!

Our next stop would have been Haunted Mansion, but unfortunately it was closed for refurbishment. During Halloween and Christmas, the mansion gets a makeover to become a special Nightmare Before Christmas theme. It would have been amazing to see it!
After a quick walk through Frontierland and Critter Country, we decided it would be a good idea to hit the Matterhorn before it got too crowded. Since only Mom and I were riding, we decided to try the single rider line to see if it really was faster. It did not disappoint! We waited maybe 10 minutes while the regular line was almost an hour wait (Matterhorn does not have FastPass).


Next it was finally time to hit some Fantasyland attractions. Pinocchio's Daring Journey, Mr. Toad's Wild Ride, and of course Peter Pan's Flight. The first two are not at WDW, and Disneyland's Peter Pan is slightly different than the WDW version. We ate lunch at the Hungry Bear and it was YUM! Great views of the river boat while you eat.
After lunch, we wandered back over to Adventureland for a Dole Whip, and enjoyed some more of the less popular attractions while we were there. Crowds were fairly light, so we had almost no waits all day. This brings me to another noticeable difference between Disneyland park and its sister the Magic Kingdom: Although the layouts of the park are basically the same, because Disneyland is smaller the crowds are more compact. This means that even though there are not very many people in the park, it can still feel crowded along the pathways because the area is so small. At Magic Kingdom everything is spaced out, so a heavy crowd feels lighter and a light crowd feels nonexistent. They best way to really tell how crowded a park is, is by the wait times. If you don't have to wait more than 30 minutes for any attraction, crowds are very good. Now, where was I? Oh yeah...
We then headed to Tomorrowland to check out Star Tours (this was my parents first time to ride the new 3D version... We rode it twice in a row, so I think they approved of the update lol). Space Mountain was also closed for refurbishment, so we decided to do Buzz Lightyear (the same as the WDW version), and something WDW hasn't had in a very long time: The Submarine Voyage.

This is Disneyland's Finding Nemo attraction, and while it looks good on the outside, the ride itself was a little underwhelming. Epcot's version definitely has it beat.
After Nemo, we were finally able to ride the Alice in Wonderland dark ride. On our first run through of Fantasyland, it was down for technical issues. I really enjoyed it. The ride vehicles are kind of small, but story and effects were great.
Our next (and final) attraction in Disneyland for the day was one of my personal favorites: It's A Small World. I was so excited to experience this version! The Disneyland ride was updated a few years ago to feature dolls that represented characters in Disney and Pixar films. For example, in France you can see Cinderella and in Hawaii you'll find Lilo and Stitch. I LOVE these new additions! The outside is also different. At Disneyland, the building is much grander and beautifully landscape. Still, it's hard for me to say which Small World I like better. They are both top notch attractions!
By this time, the golden hour for photography was just beginning. On our way out of the park (it was closing early at 7 p.m. so it was close to closing time anyway), I took time to photography Sleeping Beauty's castle in all her subtle splendor. The castle is probably the most notable difference in California and Florida. At WDW, Cinderella's castle is tall and dominating of the landscape. It's the first thing you notice when you walk in, and it can be seen from anywhere in the park. Sleeping Beauty castle is nothing like that. My mom said it was actually kind of disappointing. There is no grand reveal at the end of Main Street, no spires reaching for the sky...In fact, you barely notice it until you're right on it. But in the same way that the grandness of Cinderella's castle makes it beautiful, the quaintness of Sleeping Beauty castle makes it equally beautiful. It is amazingly detailed, more so that the castle at WDW, and it feels more welcoming. You don't feel like a guest of royalty walking through, you feel like you ARE royalty. I could have photographed it for hours.


We purchased (as we always do) the park hopper option with our tickets. There is no reason not to buy this at Disneyland! The parks are just steps away from each other, so you can come and go as often as you please without losing any time at all. We were all anxious to see the new Cars Land at California Adventure park (that park was also open later than Disneyland), so we headed over to check it out.
DCA (Disney California Adventure) was totally redone in 2012, and it is AMAZING! It's kind of like Disney Hollywood Studios at WDW, but...not. As soon as our tickets scanned, we headed straight for the jewel of the park: Cars Land. Talk about jumping into a movie! Let me tell you, Radiator Springs is no longer a fictional town. It exists at DCA!

Mater and Lightning stroll through the streets like real cars, stopping to chat with fans every so often. It is the coolest thing ever! The main attraction in Cars Land is Radiator Springs Racers. It was the longest line we had all day (about 45 minutes), but it was more than worth it. Racers is a lot like Test Track in WDW. Same technology, same ride vehicle, only the story telling and audio animatronics here are out of this world! It's like a combination dark ride and rollercoaster. Before you actually "race" (it's kind of rigged, the car on the left always wins), you take a drive through the town. You go tractor tipping with Mater, get a paint job  from Ramone or new tires from Luigi. When the green flag drops, you better hang on, cause this ain't just a breezy ride around a track. There are crazy dips and hills and turns...it was AWESOME!!!
By the time we had finished Cars Land, we were all starting to feel the day. So after a quick stop at World of Disney, we loaded back up on the bus and headed for the car to start the drive back to the campground. The whole ride back, I couldn't stop thinking how amazing the day had been. I had gotten to see and do things I never thought I would. It was a day that I will never forget and will never be duplicated. For so long I had been telling my friends and readers that first visits were special, and even though I do remember my very first WDW visit very clearly, I think I'd forgotten just HOW special it really is. On my list of best days ever, it's definitely in the top 5.
 
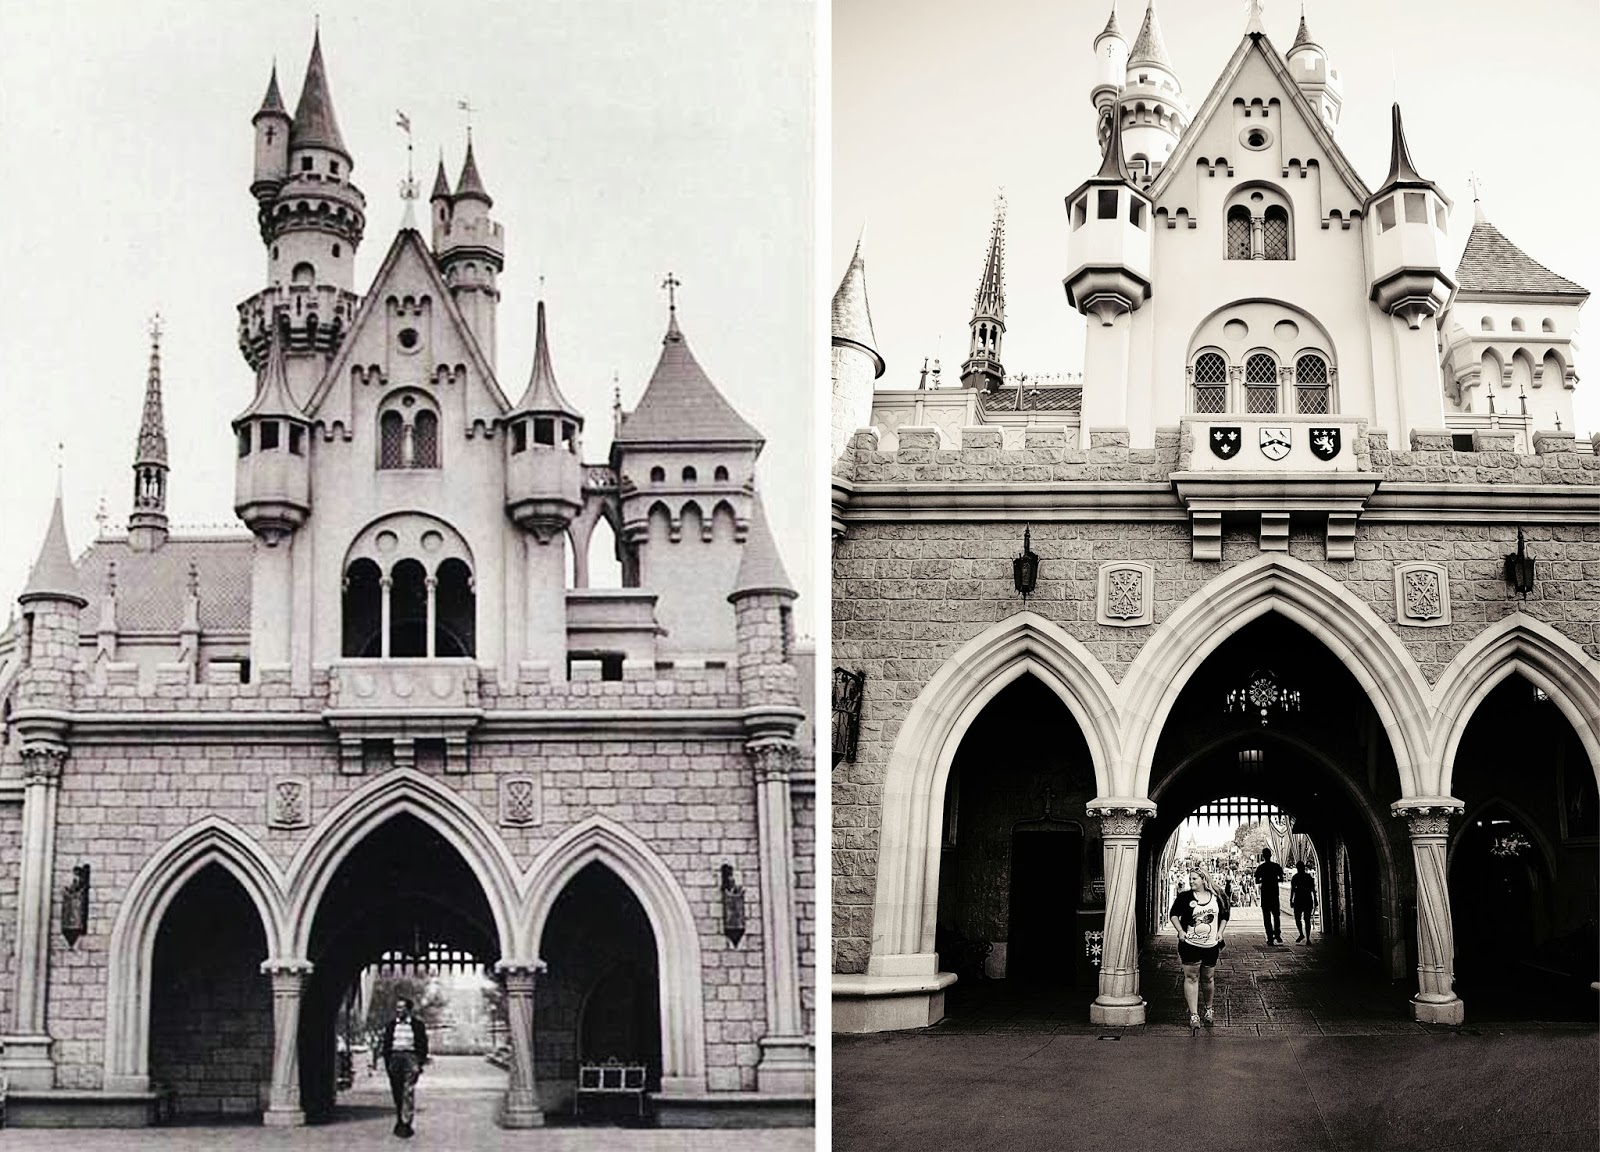
The image on the left is one of the most famous photographs ever captured of Walt. As soon as I knew we were going to Disneyland, I knew I wanted to recreate it. I can't begin to tell you how it felt, to be there in that spot, to walk in his footsteps. Absolutely inspirational and moving to think that one man, one determined, imaginative soul could create so much for so many people. Many of us have him to think for our entire childhood. I know I wouldn't be me if there were never a Walt Disney.
 
 
Stay tuned for Day 2!


Disneyland for a day...or two?

     It's been exactly 13 days since my first walk down Main Street, USA in Disneyland. I meant to blog about it sooner than this, but well, you guys know I'm terrible at keeping this thing updated. Anyway, I finally had a moment to spare, so now on with the show!
 
     What can I say about my first visit to Walt's original magic kingdom? Honestly, I'm not sure there are really any words to describe it. The way it felt walking down Main Street, seeing the Sleeping Beauty Castle on the horizon for the very first time, is a feeling I've only felt once before...when I was 2 and my parents took me to Walt Disney World for the first time. But somehow this was different. This was more than just that feeling of belonging and "home." Disneyland has one thing that Disney World never will: Walt.
     Disney enthusiasts often refer to Disneyland as "Walt's park." It used to bother me when I heard that, like they were saying Disney World wasn't as good. But now I understand. It's not that one park is any better than the other (they both have their strengths and weaknesses), but rather that Disneyland just has a distinctive Walt-ness to it that all other Disney parks will forever lack. This is the only theme park Walt designed, built, and enjoyed. It's the one he would walk around in the wee hours of the morning in his bath robe and slippers. In many ways, it was both the end and the beginning of his greatest dream.
     I'm glad I waited until now to visit. I've had a couple of opportunities to swing by throughout my life, but something always changed the plan. I'm glad that I didn't get to visit those times when I was younger. I don't think I would have been able to truly appreciate Disneyland back then. But now that I've done so much reading and research and learning about Walt Disney, the man and the legend, I was able to appreciate tiny little details most guests today probably don't even give a second look. As we would experience certain attractions or just walk through the different lands, my mind was remembering all the stories I'd heard about how all this came to be. Finally seeing it all in person was an amazement I could never begin to explain.
     Since I knew most of my friends were vacationing vicariously through me, I live tweeted and instagramed throughout both days of my visit, capturing more professional shots with my DSLR in between. Some of you might be thinking, "Wait, TWO days? I thought you were only going for one?" You're right, we were. But we got a little ahead of schedule with the rest of the trip and had a day to spare, so the others decided that an extra day in Disneyland would be fun (let me point out that it was NOT my idea. Shocking, right?). I wasn't about to disagree with that!
   Just so that this post doesn't get any ridiculously longer than it already is, I'll be sharing more about our trip (including images) in two separate posts, one for each day. So stay tuned for Day 1! For now, I'll leave you with that one photo everyone MUST take on any Disney trip: the family photo in front of the castle :). I would have never gotten there if not for these three. They made it extra magical!


Sunday, February 17, 2013

From Orlando to Anaheim

2,500.
That's how many miles separate Walt's biggest dream from his most daring. One started out as an orange grove in southern California. The other as a cow pasture in central Florida. People thought he was crazy when he bought the first one, and a genius when he bought the second. I think he was probably a little bit of both.

Most Disney kids in the good ole USA grow up one of two ways: The kids in the western half of the country are raised at Disneyland, and the ones in the eastern half are raised at Disney World. It's just a geographical fact of life. That's why I can count on one hand, the number of people I know that have been to Disneyland. Around here, it's a small group. And I'm about to be a part of it.
Oh. Em. Gee.

This year's family vacation to Alaska (yeah, we're driving to Alaska lol) comes with a return trip right through the heart of southern Cali, just a stone's throw from Anaheim. I was surprised at how little begging was required to get my mom to allow me a little Disney indulgence. One day. She said I can have one day. And you can bet I'm going to make every second count.
But planning a trip to Disneyland is nothing like planning a trip to Disney World. That's the lesson I am quickly learning. There are only two theme parks (both within walking distance of each other), but there is so much crammed into this tiny area that I get lost just looking at the map. The scheduling is totally different than I'm used to, and the park website doesn't have any of the handy tools that I swear by. That's when I realize that I am a WDW kid, and I am not a pro here. I am a 100% Disneyland ROOKIE!
So now I find myself in the shoes of all the friends who ask for my help in planning their first trips. I'm anxious, a little nervous, and slightly overwhelmed. But despite all that, above everything else, I am EXCITED!!
Walt Disney is my hero. His story is my inspiration to keep chasing dreams and never give up on myself. And now, like in Marceline, I will get the chance to walk in his footsteps. I will get to stand in the same spot where he stood under Sleeping Beauty's castle, watching all the magic he had created. I'll get to feel that magic for myself in Walt's original magic kingdom. I know it will be a day I'll never forget....
If I can survive the planning! :) Get ready for more Disneyland planning posts!

 
Photo from the fabulous photogs at the Disneyphotographyblog.com. They have lots of amazing Disney parks cover photos you can download. (I just added some text to this one of Sleeping Beauty's castle.) Check them out!