Showing posts with label planning. Show all posts

Monday, March 17, 2014

Tips for visiting the parks during pregnancy

     Less than a month after I booked mine and my husband's 5th anniversary trip to Disney World, we found out that our family would be growing by two little feet. Many people thought it was crazy to be going to Disney at 6 months pregnant, but I was more than excited! What a great opportunity to get some beautiful and unique maternity photos, and to just slow down and take time to enjoy the parks. I could not imagine any better way to celebrate!
     If you are thinking about planning a trip to the theme parks during your pregnancy, there are a few things you need to keep in mind. For instance, what attractions are safe and not safe to ride, as well as keeping well hydrated. You also need to keep in mind how far along you will be during your trip. Based on my experience, I would not recommend going when you are farther than 24-28 weeks along.
     Here are some tips for expectant mothers in the parks, as well as some tips on getting great maternity photos.


1. Pace yourself. As someone who is used to being there when the park opens and going hard all day until closing, I was in for a surprise when I had to try out more benches than normal. Don't be afraid to take a break when you need it. You will be doing a lot of walking, so sometimes a short rest is necessary to catch your breath. Because you will not be able to ride some of the more popular attractions, you will have extra time to sit and enjoy people watching.

2. Try new things. If you are a WDW veteran, this is a great time to try things you've never done before. For example, if there are less popular attractions that you have never experienced (because perhaps time didn't allow it), now is your chance to try it out. If you have odd cravings, now is also a great time to try to restaurants and quick service meals. We ate more than normal on this trip, and really enjoyed trying out new places.

3. Avoid certain attractions. Disney posts health restrictions outside all of the attraction ques. The ones that have an expectant mother warning are: Space Mountain, Big Thunder Mountain, the Barnstormer, Dinosaur, Expedition Everest, Mission Space, Primeval Whirl, Rock n' Roller Coaster, Splash Mountain, Star Tours, Test Track, and Tower of Terror. Kilimanjaro Safaris also has a pregnancy warning, however, after thoroughly researching why, I chose to ride it and was totally fine. The main reason for the warning is because of the bumpy roads. But if you're from a rural town like I am, you probably drive on roads every day that are much rougher than the safari. There are other rides that do not have a warning, but can make some pregnant women sick (if they are prone to it). These are rides like Dumbo, the Mad Tea Party, Aladdin's Flying Carpets, and anything that spins.

4. Drink plenty of water. This is especially true if you are going during hot weather. We were there just a week ago, so we had pleasant Spring weather that wasn't too hot. It's a great idea to carry a water bottle with you and refill it at the water fountains. This is a great way to save money, and Disney water is yummy.

5. Wear the most comfortable and supportive walking shoes you own. This applies to everyone, not just expectant mothers. I highly advise against wearing any type of sandal or flip-flop to the parks. You need shoes with good walking support, otherwise your feet, legs, and back will hurt much more than necessary.

 
Taking Maternity Photos in the Parks
     Disney is a perfect place to get unique photos! There is no shortage of beautiful spots around all four theme parks. Because we didn't spend as much time on attractions as we normally do, we had plenty of time to take photos. Here are some tips for doing your own maternity photos in the parks:
 
1. The classic shot in front of the park icon. The photos that almost everyone gets on every trip are the classic poses in front of Cinderella's Castle, Spaceship Earth, the Tree of Life, and the Sorcerer's Hat. All you need to do to make these maternity shots is to place a simple hand on the belly. This draws the viewer's eye to where your bundle of joy is being carried. There are always PhotoPass photographers in these locations. They will be happy to take a photo with your camera, as well as one with PhotoPass.
 
2. Use props. A pair of baby shoes, a sonogram photo, or even a personalized baby ear hat make great props for maternity photos. You can hold the objects, or place them in the image by themselves. Because we knew we were having a boy, we bought a personalized ear hat and placed it in various locations such as the Partners statue and the monorail, to have some distinctly Disney images.
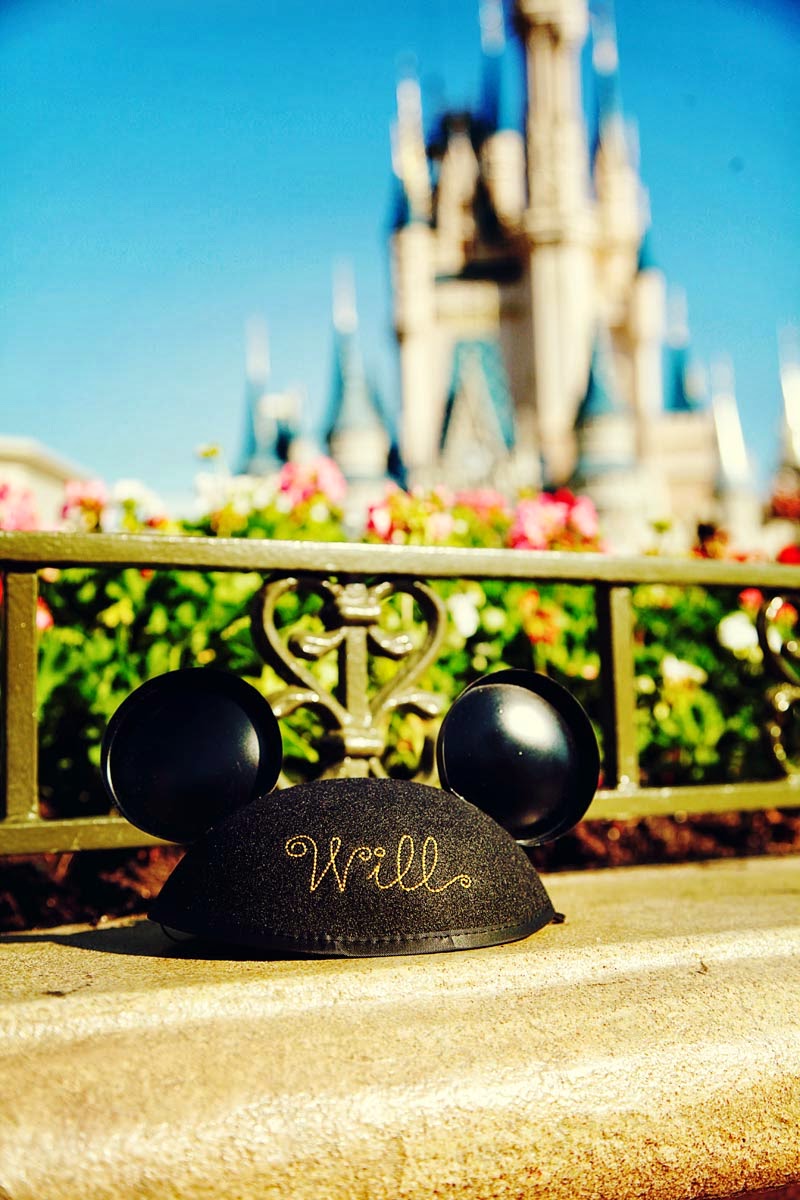
 
3. Look for places off the beaten path. World Showcase at Epcot is a treasure trove of photo opportunities. There are tons of places to get great photos that don't necessarily scream "taken at Disney World." My favorite spot is the Morocco pavilion, underneath the archway and around the hidden fountain just to the left. Asia land in Animal Kingdom has lots of interesting walls and doors that provide a great texture for your images. In Magic Kingdom, use the castle wall or the archways in the entrance to New Fantasyland to create a classic look.


4. Meet the characters. Who doesn't love a classic photo with Mickey? Depending on how far along you are in your pregnancy, you can even get the characters to help you reveal the gender to friends and family, or even make the big announcement that you are expecting. If you plan to do that, be sure to bring a sign or something that makes your announcement, then just ask the character to hold it in your photo.
 
5. Posing. When doing maternity portraits, I always ask my clients to place at least one hand on their belly in every shot. This draws attention to the very purpose of the photo. You can place one hand on the top of your bump and the other underneath, or just one hand in either location. Also remember to take some shots that are just of the belly, keeping your back all the way to one side of the frame (like we did in the first image on this post). Leaning against a wall is a great classic pose that is very flattering to most anyone. Take a step or two away from the wall and lean back so that your shoulder blades (and not your entire back) are touching the wall. Take the foot that is farthest away from the camera and step in back toward the wall, letting your knees bend slightly. Keeping your weight on that back foot gives you a slimmer figure and really shows off that gorgeous baby bump (See the black and white image above). One last thing: don't forget to take some photos where you are looking down at your belly. This too helps draw the viewer's eye to the focus of the image.
 
     I hope you can find these tips to be helpful on your trip. Don't be afraid of visiting the parks during pregnancy. If you and baby are healthy, there is no reason why you can't have just as much fun as you always do. I loved it so much, that I hope I am able to visit during any future pregnancies!
 

Taking your Toddler to the Parks

     Ever since we found out we were expecting a baby this summer, I have been planning his very first Disney trip. Is it a bit too early? Never! Planning a trip with a little one is a bit different than planning a trip with all adults, or even with older kids. Does that mean you are limited in what you can do? Absolutely not! Disney does everything possible to make bringing your toddler as pleasant and smooth as it can be. After all, this place was built for families right?
     In this post, I'll be sharing a few tips and tricks for visiting with toddlers. Keep in mind that my first trip with my own toddler is still about 3 years away, so most of these tips actually come from my mom, who is a pro when it comes to wagging a little tyke around the parks, as well as my own experience actually being a toddler at the parks. (Yes, I remember it very well!) So without further delay, here are my tips for toddlers!


1. What age is the best time for a first visit? This question is one I get asked a lot. The answer is different for every child, depending on their imagination and attention span, but the general rule is anytime after they are potty trained. For most children, this is around 2 or 3 years old. I was 2 1/2 when I had my first visit. My son will be the same age. Some people think this is too young, using the excuse that the child "will not remember it," but this is just what it is: an excuse. I remember every detail of my first visit to the Magic Kingdom (in fact, it's my first vivid memory of life period). Memory is no reason to wait to take your child to the parks. Even if they don't remember it when they are 2, you will. You will remember the magic and light in their eyes during every first moment. That magic dims a little more the older they get. Children age 6 or 7 are not nearly as compelled to believe in make-believe as younger ones. Besides, don't think that you are only going to take your child once in their life. You will probably revisit the parks again and again as they grow.

2. Use a stroller. If you don't think it's worth it, just ask my mom. On my first trip, they opted not to you a stroller for just one day and totally regretted it. There is an insane amount of walking involved in a Disney trip and toddlers will want to be carried for most of it if they are not riding in a stroller. You can bring a stroller from home, or you can rent one from Disney. There is much debate over which option is better. As with anything, it depends on what's right for your family, so I will simply share with you what we are planning on doing. After watching countless tired parents having to lug their big strollers on and off trams, monorails, buses, and boats, it was a no-brainer for us to rent. You can rent single strollers from Disney for just $15 per day (double strollers are available for $31 per day), or you can rent them for the entire length of your stay for $13 ($27 for doubles) per day. Strollers cannot be removed from the parks (a blessing, trust me), so when you are finished at one park and ready to go to another, all you do is return your stroller, go to your next park and show your rental receipt and they will give you a stroller to use there. Easy as that, and great for park hoppers. If you bring a stroller from home, you will be required to fold it every time you get on a tram, bus, or boat. Monorails do not require folding. Every attraction has stroller parking nearby.

3. Get the Park Hopper option on your ticket. This is another one of those things that people debate over. Some say it is a waste of money, but others (like me) couldn't live without it. It's especially handy if you have a toddler. Why? Naptime. If your toddler (or you lol) needs a break to rest during the day, with Park Hopper you can return to your room for a few hours, then head back to the parks later without having to use another ticket day. Park Hopper also allows you to maximize your time and do what you want, when you want. You are not limited to remaining in one place the entire day. With toddlers, variety is a very good thing!

4. Take small snacks. Disney allows you to bring your own food and drinks to the parks (but no coolers), so pack a small baggie of your child's favorite snack to hold them over between meals. You also might want to carry a couple bottles of water. Once your bottle is empty, you can refill it at one of the water fountains. We did this on our last trip and it was very convenient and saved us the extra drink money.

5. Don't push character greetings. This tip comes from a very scared little girl who really did NOT want to meet Tigger as much as he wanted to meet her. Not all kids will love to talk and play with the characters right away. On my first visit, my parents tried to get me to interact with characters like Tigger, Mickey, and Minnie, but I was very shy and scared of them. I was not expecting them to be that BIG! I loved watching them from a distance, but up close meet-and-greets were not my thing yet. I didn't really enjoy the characters until I was 5. Not every child is this way of course. Your child may love the characters. But if they don't, don't try to push it. I know how much you want that classic photo with Mickey, but sometimes you just have to wait until they are ready to come out of their shell.

6. Staying away from loud noises. If your child does not do well with very loud noises, like fireworks, try viewing the show from farther away than normal. At Magic Kingdom, most crowds gather around the statue and hub area in front of the castle. Most people don't realize there is a perfect viewing area from the second level of Main Street Train Station. This is far enough away that the booms aren't so loud, but is still a great view of the entire show. At Epcot, try viewing Illuminations from anywhere on World Showcase. No crowd and a more spectacular view.

7. Rider Swap. Just because your little one is too small to ride the rollercoasters doesn't mean you have to miss out. Disney offers something called Rider Swap. One parent gets in line to ride the attraction and is given a ticket. After they ride, they come back and give the ticket to the other parent who then rides with little to no wait. This way, one parent is always waiting outside with the child. This is very similar to doing the single rider line, which is a super fast and great way to ride the big attractions like Rock n Rollercoaster, Tower of Terror, Expedition Everest, and Space Mountain.

8. See it through their eyes. Don't forget to take an opportunity to see things from your toddler's level. For example, when watching a parade, crouch down to their height and see it from their view. Some of the things you may think are annoying or cheesy are absolutely inspiring to them (ever heard of It's a Small World?). Take the time to enjoy those magical firsts. You won't ever get them back.

Thursday, March 13, 2014

Disney Magic Band and FastPass+ review

     When Disney first announced the coming of Magic Bands, I was a little more than skeptical. The current system of key cards and paper FastPasses seemed to be working just fine, so was a total overhaul of hotel rooms, park entries, and FastPass kiosks really necessary? But Disney has always loved to be one step ahead of the rest of the entertainment world when it comes to technology, so they were going there whether their fandom approved or not (and most of us did not). This new system got rid of paper tickets or “Key to the Kingdom” cards. Instead, each guest is given a personalized Magic Band months ahead of their vacation which acts as their theme park ticket, FastPass, hotel room key, and credit card. In reading the first reviews and articles, it made me weary to think that anyone, even the company that I trust most, would have that much of my information all stored in one tiny place. When I booked our fifth anniversary/maternity trip for this past week, I was hoping I would have the option to forego Magic Bands (as the system is officially still in testing phase). Alas, the choice wasn’t there, so try Magic Bands we did.
    
I’ll be honest, after the first day I was fully prepared to write a huge post about how we were right all along and this was the dumbest thing Disney has done since turning Cinderella castle into a giant birthday cake. But by the last day of our trip, I was conflicted and confused. To put it shortly, Magic Bands and I have a love/hate relationship. Let’s start with the obvious: the hate part.


Magic Band Cons

They are quite uncomfortable. The bands are made of a plastic/rubber material and are waterproof and durable. The fastening mechanism is kind of like the one on those old trucker hats, with the prongs and holes. The way it’s made, it is a little difficult to put on one handed. The hard, inflexible area where the microchip sets, is about an inch to inch and a half long. This makes the ends of the band point down toward the center, creating a triangle shape that does not conform to the oval shape of your wrist. Thus, the band is quite annoying to wear. After entering the parks, we took ours off and put them away in the bag. We noticed a lot of other guests doing this too, and hardly anyone was actually wearing theirs. (Isn’t this exactly the thing that Magic Bands were supposed to save you from doing? Having to get your tickets in and out of your bags or wallet? Hmm...)
They don't always read correctly. This happened to both of us multiple times throughout our trip (to me, so much that mine had to be reset). If your band works properly, the Mickey symbol on the scanner will light up green (blue if it does not go through). We had issues getting into the parks at times (never at our hotel or with FastPass+). It often happened as we tried to enter our second or third park for the day. It would work fine one time, but the next it may take 3 or 4 tries before it would go through. I have no idea what could be causing it, whether it was something we were doing wrong or the bands themselves.

It's all in one. You lose your band, and you've lost your ticket, your FastPasses, your hotel room key, and a credit card. That just makes me nervous. Because we didn't want to wear them, it was harder to keep up with our bands because they can't just slide into a wallet like a card.
 
Magic Band ProsFaster entry to the parks. The introduction of Magic Band meant that all turnstiles were removed from the park entrances. Now, all that is there are the band scanners. There are two scanners per line (think of it like a gas station with multiple pumps). When the bands are working properly, it creates a much smoother and faster traffic flow into the park. It was amazing how much quicker we got in, even with long lines at park openings.
It's all in one. The very thing that first made me iffy about these bands is also one of the great things about it. In theory, it really is much more convenient to only have to keep up with one "key" if you will. You don't have to worry about keeping up with a hotel key, park tickets, and paper FastPasses individually. I'm just not sure a bracelet is the best thing to replace it all with. 
 
     I've mentioned before that I do not use FastPass. Because so many people do use it, standby lines have become much shorter and (if you know how to time things) FastPass is unnecessary. With the introduction of FastPass+ rules limiting the number of passes you can obtain per park per day, it means that standby lines are slightly longer than they have been in recent years (at least at busy times like Spring Break). With the new FastPass, you can only get passes for 3 attractions in each park per day. That means you will spend the rest of the day in standby lines for the other attractions. You can book your passes up to 60 days before your vacation via the My Disney Experience app on your phone or on the WDW website. You can also book them at the parks the day of, by visiting one of the new FastPass kiosks (right now these kiosks are just cast members with iPads in different areas of the park). I had no intention of using FastPass+ on this trip. The first day we were there, at Animal Kingdom, the FastPass return line was much longer than the standby line, further convincing me that FP was unnecessary. However, when we had ridiculous wait times at the other parks, we decided to give it a try. This is what we discovered:
 
FastPass+ Cons
You will spend all your time in line just to get your FastPass. Some of the longest lines we saw all day were the lines for the FastPass+ kiosks. We had already ridden three or four attractions before some people even had their passes. If you are going to use FastPass+, I highly recommend booking them using the My Disney Experience app. Otherwise you will not be accomplishing any kind of time-saving. I booked ours in less than 10 minutes on my phone while waiting in line for the Haunted Mansion.
It is only productive at certain times. As I mentioned earlier, we were at Animal Kingdom on our first day and noticed that the FastPass return lines were much longer than the standby lines. We were there from lunchtime until close and this was consistent throughout the entire time. FP is now offered on most every attraction, but is really only useful for a handful. The rides that they come in most handy for are: Rock n' Rollercoaster, Tower of Terror, Toy Story Mania, Peter Pan's Flight, Space Mountain, Soarin, and Test Track. All others tend to have comparable standby times.
You're day revolves around your FastPass. We did a lot of waiting around for our FP time to arrive, often standing right outside the attraction, but not being allowed to go in. Your time must be right on the dot, not one second earlier, before you are allowed to enter. Our return times for the different attractions did not permit much time to do anything in between them, especially since all the attractions were often on totally opposite ends of the park. Backtracking can sometimes be very unproductive and tiring (plus I can't stand being on that tight of a schedule).
 
FastPass+ Pros
You can save major time on certain attractions. Our biggest time gain was on Peter Pan's Flight. The standby wait was 45 minutes. We were on and off the ride in 7 minutes with our FastPasses. This will probably be the one ride that I will use FP for from now on. The other two attractions we had passes for  had reasonable standby times (less than 25 minutes), so we really didn't make up a lot of ground there.
The FastPass limit makes the system much more productive. The one thing that most people hate about the new FastPass+ is one of the things I like most. The biggest reasons standby lines back up is because there are too many FP people "breaking" line. With the new limit, we noticed these interruptions in traffic flow were much fewer, thereby making the line move faster than the posted wait time. The sign may have said 20 minutes, but we really only waited 10 or 15. It also means that you can't be as dependent on FP as before. I've seen too many people use FP as a crutch. They think that if they can't get a FP, then they can't ride it or it's not worth it. But they are missing so much! Sometimes the standby que is the best part of the ride. For example, the que line for Haunted Mansion is incredibly interactive and fun (it was even before all the upgrades. I loved reading the headstones). There are so many things to look at and play with that you don't feel like you're waiting at all. These elements also add to the story of the attraction. If you use the FP line, you miss every bit of it.
 
     Although Disney has been testing this new system for a while (almost a year I believe), there are still a few bugs that need to be worked out. It does, however, have a ton of potential. I guess, in the end, you could say that I'm not as against it as I was before. I see what they are trying to do, and I think the theory is a good one. Perhaps some changes need to be made in the execution, but that's what testing is for. The parks have changed tremendously just in the last 5 or 6 years. Crowds are much heavier than they have ever been (aren't we suppose to be in a down economy at the moment? Can't tell it!), and the next generation expects everything to be digital. Disney has always prided itself on adapting to a constantly changing world (one of the reasons they are so successful), so perhaps this really is the best way to, as Walt said, "keep moving forward."
     Overall, a grade of a B- from me!


Monday, July 9, 2012

Miranda's Top Must-Do's for the Little Ones

So many of my friends are planning their kids' very first Disney World visit this year, and I'm so excited for them! Many have been asking me what's great for the younger kids to do in the parks, so I thought I'd give all you moms and dads a quick list of my top "must-do's" for the little ones at each theme park. There are plenty more great attractions for the kids than just the ones I'm listing, but my inner 2-year old is writing this post and these were always her favorites :). Enjoy!

Magic Kingdom

  1. Peter Pan's Flight (in Fantasyland) -- This has been my all-time favorite attraction at Disney World since I was 2. The kids will LOVE it! This is one of Disney's classic "dark rides" which uses black lights (super cool if you wear white!) and audio-animatronics to take you through the story of Peter Pan. You hop aboard a flying pirate ship and journey from the Darling's nursery to Neverland, soaring over London along the way. You'll see the mermaids, the Indians, and Peter's epic battle with Captain Hook. Here's a tip: Although the ride only lasts about 3 minutes, it is very popular and the line is almost always long. If you're going at a crowded time of year, you might want to grab a Fast Pass for this one.
  2. The Country Bear Jamboree (in Frontierland)-- Yes, it's a little corny, but when you're a little kid there's nothing much cooler than a bunch of singing, dancing, talking bears. The Jamboree is one of those attractions that often gets overlooked, but is still a wonderful piece of Disney storytelling. You take a seat in a saloon-style, old-time theater, sit back and enjoy some great songs and entertainment from the Country Bears. This is the attraction that inspired the 2002 movie "The Country Bears."
  3. It's a Small World (in Fantasyland)-- Ok, so this isn't usually the parents' favorite, but I promise the kids will love it! There is so much to look at and so many wonderful colors in this ride that you can ride it over and over and see something new (trust me, I made my parents do it! LOL). I'm sorry, but the song probably will be stuck in your head :). At least there is almost never a wait time, and it is a great way to relax and cool off in the park.
  4. Dumbo (in Fantasyland)-- Everyone's favorite flying elephant gives little ones the chance to soar up high in the sky... or at least it seems like it. Dumbo is a simple ride of up and down and round and round, but it's a winner with kids. And now that it's reopened in it's new location as part of the Fantasyland expansion (see my previous post about the expansion for more info), it's twice the fun with a new interactive que and extra riding capacity.
  5. Under the Sea (the Little Mermaid ride in Fantasyland)-- This attraction in the New Fantasyland tells the story of the Little Mermaid in a not-at-all scary dark ride. You hop aboard a clam shell as Scuttle begins to tell the story. A ride backwards downhill makes you feel like you are diving beneath the ocean surface and into Ariel's world.
  6. Enchanted Tales with Belle (Fantasyland)-- The other new attraction in Fantasyland is from Beauty and the Beast. This attraction is completely based on interaction with the children in the audience. You travel via magic mirror from Maurice's cottage to the library of the Beast's castle where Belle is waiting for storytime. Children are chosen to become different characters from the movie, such as Lumiere, Cogsworth, Chip, and Mrs. Potts. They help Belle tell the story. It's a great to way to meet-and-greet with characters!

Epcot

  1. The Seas with Nemo and Friends (in Future World)-- This is probably Epcot's best attraction for the kids. It's another classic dark ride that takes you through the ocean in a "clammobile" as you search for... yep, Nemo :). Nemo, Dory, Marlin and friends swim around the aquarium with the real fish (still trying to figure out how they do that) and sing great songs you didn't hear in the movie.
  2. Turtle Talk with Crush (in Future World)-- Next door to the Nemo ride is Turtle Talk with Crush. This is another amazing technological wonder from Disney. Your kids can actually talk to Crush, ask him questions, and he will answer them! Pretty cool, huh?
  3. Journey into Imagination with Figment (in Future World)-- This ride has changed a lot from when I was little, but it is still a hit with younger kids. You're on a tour of the Imagination Institute, exploring the five senses, but Figment keeps interrupting and causing big laughs. It's cute and quirky, with a great interactive area at the ride exit.

Disney's Hollywood Studios

  1. Toy Story Mania (in Pixar Place)-- Without a doubt, the most popular ride in the park. Get there early and get a Fast Pass! This ride is awesome for the whole family. Your ride vehicle comes equipped with a pull cannon, which you use to play various carnvial style games hosted by the Toy Story characters. It's all in 3-D and makes for lots of laughs. Plus it's great when you earn braggin rights for having the high score :).
  2. Disney Junior - Live on Stage! (in Animation Courtyard)-- Your kids' favorite Disney Junior shows come to life on stage. Kids are encouraged to sing and dance and clap along with their favorite characters. There are a limited number of shows each day, so be sure to consult your guide map when you get to the park. (There are also other great stage shows like Voyage of the Little Mermaid and Beauty and the Beast Live on Stage).
  3. "Honey, I Shrunk the Kids" Movie Set Adventure (in the Backlot)-- Oh-em-gee!! You couldn't get me out of here when I was little! This is an awesome playground for the kids. They get to climb a spiderweb, slide down a roll of flim, and even ride an ant. It makes you feel like you're right on the movie set of "Honey, I Shrunk the Kids." Awesome!

Animal Kingdom

  1. Affection Section & Conservation Station (in Rafiki's Planet Watch)-- This is the place where the kids can pet and interact with real animals like goats, llamas, sheep, and more. They can also see how the animals are cared for and talk to their trainers.
  2. The Boneyard (in Dinoland)-- This playground gives kids the chance to dig up dinosaur bones, play music, go through mazes, slides, and more.
  3. Festival of the Lion King (in Camp Minnie-Mickey)-- This is my favorite show at Disney World. It's a wonderful telling of the story of the Lion King featuring amazing acrobatics, singing, dancing, and even a fire-breather. For the last song, kids are invited to come down and be part of the show. It's great fun for the whole family! (Also be sure to check out Finding Nemo The Musical in Dinoland).
  4. Finding Nemo, the Musical (between Dinoland and Asia)-- This bright and brilliant show tells the story of Nemo that we all know and love, but this time with amazing effects, new songs, and gorgeous animated characters. It is unique among Disney stage shows in that most of the cast are puppets, but I promise this isn't like any puppet show you've ever seen.
  5. Kilimanjaro Safari (in Africa)-- The safari is one of the park's top two attractions and is a must-do for the whole family. You'll hop aboard a safari truck driven by a guide who takes you from the jungle to the Savannah, pointing out and teaching you about all the animals you spot along the way. Unlike seeing them in a zoo, these animals are right up close and personal, sometimes blocking traffic as they cross the road in front of your truck. You can see animals all throughout the day, but you will often spot the most either in the morning just after park open, or on one of the last trucks in the afternoon. The ride closes before dark.

Wednesday, February 8, 2012

Disney in February = LOVE!!!

Hi gang! We're back from our trip (although against my will ;) and let me just say that February is an AWESOME time to visit! Our weather was perfect; the crowds were light; and we only missed one attraction due to refurbishment. I took about 2,000 photos. Needless to say, I'm still going through and working on them, but you can see them all as I post them on my Flickr photostream.
For now, I thought I give you my review of traveling during the "value season" at Walt Disney World. Overall, I was very impressed. All the great things I had heard and read proved true, and some of the not-so-good things turned out to be wrong (at least for us). Let me break it down into the most notable pros and cons:


Pros
*Weather - We had absolutely PERFECT weather! It was about 80 during the day and about 65 to 70 at night. It wasn't miserable hot or freezing cold either. On our third day, it was overcast which made for a really comfortable day. This was also the first time I've ever been when it didn't rain at all during our stay. For Florida that's a rare occurance indeed!

*Crowds - This is probably what I was most impressed by. We arrived at Magic Kingdom around mid-morning on our first day. Usually by then Main St. is so packed you can't move. I was pleasantly surprise to find it fairly empty! We took our time taking photos without worry of getting run over. Then we headed to Peter Pan's Flight, where I'm used to wait times of an hour or more. We only waited about 10 minutes! The next day we went to Animal Kingdom and rode Expedition Everest twice in less than 30 minutes. Our longest wait time was for Space Mountain, where we waited about 30 minutes (I've waited an hour and a half before). I also noticed a big difference when it came to the firework shows. We had spectacular spots for both Epcot and Magic Kingdom without getting there super early.

Characters - I'm not sure why, but apparently this time of year is a great time to meet some rare characters. We met Pocahontas, the Evil Queen, Mary Poppins, Thumper, Chip and Dale, Pluto, Phineas and Ferb, Tinkerbell, Goofy and Max, Pooh, Cinderella's stepmother and stepsisters, Woody, Buzz, Mickey, Minnie, and my favorite: Peter Pan! We also saw several other characters that I had never seen do meet-and-greets before. The lines were also fairly short, so it was easy to meet several of them quickly. Sometimes we didn't even have to stand in line at all.

Cons
Refurbishment - When doing research, this was just about the only con that kept popping up, although for us, it wasn't much of one. There was a lot of refurbishing on Main Street, with several of the buildings being covered in construction wrap, but all the main attractions were still open. The only thing that was closed that we wanted to do was Big Thunder Mountain Railroad, so the whole refurb thing didn't affect us much.

Seasonal show and parade cancellations - While refurbisment wasn't an issue, this was. Fantasmic does not show this time of year, and for the week that we were there, Main St. Electrical Parade wasn't showing either. This really bummed me out, as they are two of my favorite things. On the bright side, we were able to get in bed a little earlier on a couple of nights.

So there you have it. Would I plan another trip for February? You bet! Other than October, it's probably my new favorite time to visit. The pros definitely outweigh the cons (and did I mention it's cheaper too!). Until next time, I'll leave you with one of my favorite shots from Wishes. See ya real soon!

Miranda

Tuesday, January 24, 2012

Tickets? Check. Hotel? Check. Tootbrush?...Uhhh...

Eeeeppp!!! Just one week until I'm back, zooming across Space Mountain, dodging the yeti on Everest, and speeding around Test Track. Wow, those 100 days went by fast! Now we're getting down to crunch time. This is the part of planning where you "dot your i's and cross your t's." Everyone has their own way of doing things, but here's my "Week Before" checklist. 

#1. Vouchers and Reservation Information
About a month or so before your vacation, you will receive a packet in the mail of maps, brochures, vouchers and details about your reservation (see my "Magical Mail" post). Be sure you hang on to this packet, especially your voucher book. If you flip through it, you'll see that one of the very first vouchers is for your hotel room. You'll need to bring this with you when you check in. You can use the other vouchers throughout your visit. It's also not a bad idea to hold onto your reservation confirmation number. Although I've never had an occasion come up where I needed it, I always like to have it on hand just in case.

#2. Double-Check the Park Calendars
It's always a good idea to take another look at the park calendars on the website as your vacation date approaches. Disney has been known to move things around a bit. For example, I had planned on us watching the Main Street Electrical parade on our last night. But last week when I went to confirm the start time on the calendar, I noticed that the showing for that night had been canceled, as were all the showings for that week. Needless to say, I was totally bummed, but now I can adjust our schedule to allow time for other attractions.

#3. Check the Extended Weather Forecast
This probably won't surprise you, but I am one of those silly people who gets so anxious that I'm packed a week in advance. LOL All that effort would probably go to waste though, if not for that ever-helpful extended weather forecast. As soon as it's available, I check the weather for Lake Buena Vista, Florida during the dates of our trip. (FYI: Disney World is not actually in Orlando. It's just a few miles outside the city in beautiful Lake Buena Vista :). This time I was happy to see highs were all in the upper 70s and lows were in the upper 50s/low 60s. AWESOME Disney weather!

#4. Don't Forget the Snack Bag!
This one is another tip I learned from my super-resourceful Mom. Snacks and drinks in the park are expensive! Just one bottle of Coke can cost you nearly five bucks. If you don't purchase the dining plan (and we didn't), then it's never a bad idea to pack a cooler of drinks and easy snacks. Feeding the whole family inside the parks for three meals a day can be very pricey, so we usually opt for a parking lot picnic in the back of the car. My mom always packs a cooler full of drinks and sandwich meats for lunch and a snack bag of cereal bars and muffins for breakfast. That way, the only meal we had to worrying about buying was supper. Trust me, it saves a LOT of money, and it gives you a little break from the crowds without having to go all the way back your resort. 

And of course, don't forget your toothbrush! LOL But if you do, don't worry, Disney's got ya covered ;).

See ya real, real soon!
Miranda

Sunday, January 15, 2012

Magical Mail

There's nothing like going to the mailbox to find Mickey's face smiling back at you. I call it "magical mail." No matter how horrible my day has been, opening mail from Disney always makes me smile. But when that mail is concerning my very soon-to-be visit back, that grin gets even bigger.
When I got home yesterday from a nearly 6-hour photo shoot, I found two such envelopes waiting for me. My sister-in-law, Kayla (who is also my ever-handy photo assistant) and I both squealed with delight. What we had received was the first "welcome" package from Disney. Guests receive it shortly after booking their vacation, usually in about a month. I've mentioned this packet in one of my earliest posts, but in case you missed it, here's a look at what kinds of goodies you get.

  • In the first envelope (top of the picture), you'll find park maps and a personalized booklet filled with details about your resort, dining plan options and special tips for your family. The last page also has a ready-made note card to record all your reservation information.
  • The second envelope (bottom right) contains all of the vouchers you receive when you book your stay at a Disney World Resort hotel. These vouchers include everything from a free round of mini-golf, to restaurant discounts, jetski rentals, arcade points, spa services and merchandise discounts. But the most important voucher is the very first one which details your hotel reservations. This is the first voucher you'll use. When you check in at your resort hotel, be sure to tear it out and take it with you.
  • Also included in the second envelope are luggage tags (bottom left) for everyone in your party. They change the look of these every year, but they are always so adorable. It adds that little touch of magic to even the most boring old suitcases.
  • One other piece of magical mail I received (not pictured) is something kind of new that Disney has started doing. Now when you book a vacation, you'll receive a card in the mail with a personal URL. Type the URL into your browser and you'll find custom tips and suggestions for your vacation. You can also keep track of all your reservation information on this page. It's pretty neat to have your space on Disney's piece of the web.
See ya soon!
Miranda

Tuesday, November 1, 2011

Planning Step 4: What time is the 3:00 parade??

Now that we've got all the major decisions out of the way, it's time for the fun part. This is my favorite part of the planning process, but for some (especially first-timers) it can seem a little daunting. You've got all these days and nights to live in the magic of Disney, so how are you going to spend them?
The first step I take to answering this question is to take a look at the calendars for each park. (You can view them on the Disney World website several months in advance.) You can view the times for major entertainment events (i.e. fireworks and parades) in the parks by clicking on any date on the calender. Opening and closing times are also listed, as well as Extra Magic Hours.

Here are the direct links to the calendars for the four major theme parks:
Magic Kingdom
Epcot
Disney's Hollywood Studios
Animal Kingdom

I always jot down the days and times for each firework show and parade in each park so that I can make a quick reference to it later. Not every event happens every day. For example, Wishes and the Main St. Electrical Parade at Magic Kingdom only happen on select nights.
The first event I schedule is Wishes. It is my favorite event at the parks, and I always love to save it for that very last night. It makes for a sort of grand finale to a great vacation. If possible, I also like to schedule Wishes for a night when the Electrical Parade happens right before the fireworks. That way, you get both events back-to-back. This most typically happens on weekend nights. This will be the case for us on our next trip, as our last night will be a Saturday night.
From there, I decide which days I want to do catch the other events. If you have the Park Hopper option on your ticket, you can visit one park during the day and then catch the nighttime fireworks at a different one. We are going to do that on our first day on our February trip. After arriving, we'll head to the Magic Kingdom first. After lunch we'll go over to Epcot and enjoy the attractions before ending the night with Illuminiations. The Fantasmic show at the Hollywood Studios does not show in February, so we will have the other two nights to enjoy extremely short attraction lines while everyone else is grabbing their spots for the fireworks.
During the day, three of the parks have parades at 3 or 4 p.m. These parades are daily, so you have plenty of flexibility in choosing which days you want to see each parade. As for us, we will be seeing Mickey's Jammin' Jungle Parade at Animal Kingdom on our second day and the Celebrate A Dream Come True Parade at Magic Kingdom on our last day. We're skipping the parade at the Hollywood Studios and instead, taking advantage of the shorter attraction lines during that time.
By planning firework and parade viewings first, it's much easier to decide other aspects of your vacation schedule, such as dining reservations, since you already know which parks you're going to be in on which days. Next I'll share with you how it's possible to see a whole theme park in less than a day ;).

Miranda

Wednesday, October 26, 2011

Planning Step 3: Tickets

In one of my very first posts, I gave you the skinny on the different ticket options available. (If you need a refresher, check out the "That's the Ticket" post.) There are three options to choose from. You can add all of them, just one or two, or none to your base ticket.
This time the only option we'll be adding is the Park Hopper option. We're going in February, so it will be much too cold to visit the water parks (adios Water Parks & More option!); and since we're really trying to save on this trip, we won't be needing the No Expiration option either.
I think I've mentioned that my favorite option is the Park Hopper. I use it every time I visit the parks
. This option gives me the freedom to jump around to multiple theme parks in the same day, so that I can see what I want to see when I want to see it. It helps add great flexibility to my vacation schedule. Let me give you one example.

Since this is Kayla and Ashley's first visit, the first thing I really want them to experience is that walk down Main St. at the Magic Kingdom. I can't tell you how excited I am to see their faces when they see Cinderella Castle for the very first time. There's just something about that walk that is profoundly magical, and I can't think of a better way to start off our Disney adventure.
But I've got a plan, and you can't see Illuminations fireworks at Magic Kingdom.
So after that inaugural walk, we'll hit a couple of classic attractions (Peter Pan!!) and then catch the monorail to Epcot. We'll spend the rest of the afternoon and evening enjoying the attractions there, and then end our first day with the brilliant Illuminations of Earth firework show. Without the Park Hopper, we would have to stay at Magic Kingdom for the rest of the day, or would have to go straight to Epcot to begin with. And another great plus: if at lunch time, we decide we need a break, we can head back to the hotel, take a nap and then head right back to Epcot without having to buy another ticket. It's like having a skeleton key that unlocks all the doors to all the parks any time you want :).


~*What do you do with that half-day at Disney?*~
This is a question that's crept up on more than a few of our vacations. From where we live, Disney World is about a 9 or 10-hour drive, depending on traffic. Usually we leave very early in the morning, around 2 or 3 a.m. to avoid rush-hour in Atlanta. Traffic is almost never an issue that way, but it does give us a somewhat annoying arrival time, around mid-afternoon. So, do you spend the full price of admission just to enjoy a few short hours at the parks?
As hard as it is for me to step on Disney property and not race to the Magic Kingdom, I have to say I can't validate paying full price for less than half the time. A few times in the past, we have paid for that extra ticket day, but not anymore. Why pay extra when there's plenty to do at Disney that doesn't require theme park admission! Case in point: Downtown Disney.
If our travel schedule causes us to arrive with only a half-day for our first day of vacation, we get settled into our hotel room, then head to the Downtown Disney area. There's plenty to do there for the rest of the evening. You can go shopping, try out some great restaurants, do a little dancing, catch a movie or a show. If you're tired from traveling, end the night early and rest up for a full day in the parks.
Another way to avoid unused park hours is to simply adjust your travel schedule. For our next trip, we're planning on leaving a few hours earlier than normal so we'll arrive mid-morning. That way, we'll still have plenty of time to enjoy the parks that day. 

Now we're getting to the fun stuff! It's time to start planning out our days :). See ya real soon!


Miranda

Wednesday, October 19, 2011

Planning, Step 2: Choosing a Resort

The main factor in the "Where do we stay?" decision is usually price. Often, the absolutely cheapest route is to stay at a hotel off Disney property. You can find places just outside the gate that are comfy and very reasonably priced. During the time when my parents and I made yearly trips, this is what we did. However, now I prefer to purchase hotel and ticket packages and stay on-property, which is exactly what we're going to do in February.
~*Choose Your Category*~
Disney offers hotels for every budget. There are value, moderate, and deluxe lodging options available. Like I mentioned before, the main goal of this trip was to be cost-effective, so we are choosing one of Disney's 4 (soon to be 5!) value resorts.
To learn more about each budget category, see my previous posts on resorts:
Deluxe Resorts Part I and Part II
Other Lodging Options
~*Choose Your Resort*~
Once you've decided on a budget category, it's time to choose your resort. Each one is uniquely themed to suit various tastes and interests like music, movies, sports and pop culture. Previously, we've stayed in the Pop Century value resort. This time we chose the All-Star Movies Resort. My sisters-in-law and I LOVE movies, especially Disney movies, so this theme suited us really well. I know they're going to love looking out the window and seeing a 3-story tall Woody smiling back at them.
You can take a tour of each resort on the Disney World website. Just click on the "Places To Stay" tab on the main menu bar. Take a look at the All-Star Movies Resort here.


Yay! Now we've got somewhere to lay our heads down. Now let's take a look at those tickets!
Miranda

Saturday, October 15, 2011

Planning, Step 1: When and How long?

The first step in planning any trip, Disney or otherwise, is deciding when you want to go. Normally, we plan for April or May, but this time we decided to try February. And here's why:
 ~*Value*~
Like most other vacation destinations, Disney has price and popularity "seasons." Mid January to mid February is the value season, when package rates are cheapest. You can book a room at one of the value resorts for around $84 per night during the value season. The same room would be $107 per night during regular season, and $134 during peak season. Peak season is any time around holidays and summer. Regular season is during the Spring and Fall months.
~*Crowds*~
Value season is also the least crowded. The kids are in school, and most people don't think of the winter months as prime vacation time. On one trip, we talked to a couple who had annual passes to the parks. They planned multiple trips throughout the year, but said their favorite time to come was during late January. The husband said it was like a "ghost town" during that time. There is little or no waiting for most attractions, and no fighting for a good spot at the parades. *Fingers crossed* that it's true!
~*Weather*~

In February, you're less like to roast than you would in the heat of July. Having been to Disney in the middle of summer, I know first-hand that it is NOT my favorite time of year to go. It is HOT! Spring and Fall are pleasant; still shorts and tank top weather, but not searing heat. December is a nice 70something in the day, but quite chilly at night. In February, the average low is in the 50s and the highs are in the 70s. Sounds like great Disney weather to me!

Once you decide when you want to go, you need to decide how long you're going to stay. I have stayed varying lengths of time at Disney World, from one week to one day, and I've found that my magic number is 5 days. This allows you one day in each park, plus one day to go back and check out anything you might have missed or revisit your favorites.
This time we are staying four days and three nights. It's a day less than I normally like, but I think with the lighter crowds we'll still have plenty of time to see everything. If you're planning your first trip, Disney recommends one week. I can't say I completely agree. If you're also purchasing the dinning plan, you'll definitely need a week (you spend a big chunk of time eating!), but if you're purchasing the basic Magic Your Way package, 5 days should be plenty.

When you decide on your vacation dates, the instinct is to book it right away, but I don't recommend it. (Believe me, it's so hard not to!) Unless you're planning on going during a holiday, chances are, rooms are going to be available. Another exception would be if you're purchasing the dining plan. Some restaurants book up quickly for reservations (Cinderella's Castle can book up several months ahead). I usually reserve my room and tickets no more than a month in advance. The longer you wait, the less likely you'll have to worry about cancelling.

Well, that does it for now. The next step will be choosing your hotel. To Disney, or not to Disney, that is the question!

See ya soon!
Miranda