Showing posts with label photography. Show all posts

Monday, March 17, 2014

Tips for visiting the parks during pregnancy

     Less than a month after I booked mine and my husband's 5th anniversary trip to Disney World, we found out that our family would be growing by two little feet. Many people thought it was crazy to be going to Disney at 6 months pregnant, but I was more than excited! What a great opportunity to get some beautiful and unique maternity photos, and to just slow down and take time to enjoy the parks. I could not imagine any better way to celebrate!
     If you are thinking about planning a trip to the theme parks during your pregnancy, there are a few things you need to keep in mind. For instance, what attractions are safe and not safe to ride, as well as keeping well hydrated. You also need to keep in mind how far along you will be during your trip. Based on my experience, I would not recommend going when you are farther than 24-28 weeks along.
     Here are some tips for expectant mothers in the parks, as well as some tips on getting great maternity photos.


1. Pace yourself. As someone who is used to being there when the park opens and going hard all day until closing, I was in for a surprise when I had to try out more benches than normal. Don't be afraid to take a break when you need it. You will be doing a lot of walking, so sometimes a short rest is necessary to catch your breath. Because you will not be able to ride some of the more popular attractions, you will have extra time to sit and enjoy people watching.

2. Try new things. If you are a WDW veteran, this is a great time to try things you've never done before. For example, if there are less popular attractions that you have never experienced (because perhaps time didn't allow it), now is your chance to try it out. If you have odd cravings, now is also a great time to try to restaurants and quick service meals. We ate more than normal on this trip, and really enjoyed trying out new places.

3. Avoid certain attractions. Disney posts health restrictions outside all of the attraction ques. The ones that have an expectant mother warning are: Space Mountain, Big Thunder Mountain, the Barnstormer, Dinosaur, Expedition Everest, Mission Space, Primeval Whirl, Rock n' Roller Coaster, Splash Mountain, Star Tours, Test Track, and Tower of Terror. Kilimanjaro Safaris also has a pregnancy warning, however, after thoroughly researching why, I chose to ride it and was totally fine. The main reason for the warning is because of the bumpy roads. But if you're from a rural town like I am, you probably drive on roads every day that are much rougher than the safari. There are other rides that do not have a warning, but can make some pregnant women sick (if they are prone to it). These are rides like Dumbo, the Mad Tea Party, Aladdin's Flying Carpets, and anything that spins.

4. Drink plenty of water. This is especially true if you are going during hot weather. We were there just a week ago, so we had pleasant Spring weather that wasn't too hot. It's a great idea to carry a water bottle with you and refill it at the water fountains. This is a great way to save money, and Disney water is yummy.

5. Wear the most comfortable and supportive walking shoes you own. This applies to everyone, not just expectant mothers. I highly advise against wearing any type of sandal or flip-flop to the parks. You need shoes with good walking support, otherwise your feet, legs, and back will hurt much more than necessary.

 
Taking Maternity Photos in the Parks
     Disney is a perfect place to get unique photos! There is no shortage of beautiful spots around all four theme parks. Because we didn't spend as much time on attractions as we normally do, we had plenty of time to take photos. Here are some tips for doing your own maternity photos in the parks:
 
1. The classic shot in front of the park icon. The photos that almost everyone gets on every trip are the classic poses in front of Cinderella's Castle, Spaceship Earth, the Tree of Life, and the Sorcerer's Hat. All you need to do to make these maternity shots is to place a simple hand on the belly. This draws the viewer's eye to where your bundle of joy is being carried. There are always PhotoPass photographers in these locations. They will be happy to take a photo with your camera, as well as one with PhotoPass.
 
2. Use props. A pair of baby shoes, a sonogram photo, or even a personalized baby ear hat make great props for maternity photos. You can hold the objects, or place them in the image by themselves. Because we knew we were having a boy, we bought a personalized ear hat and placed it in various locations such as the Partners statue and the monorail, to have some distinctly Disney images.
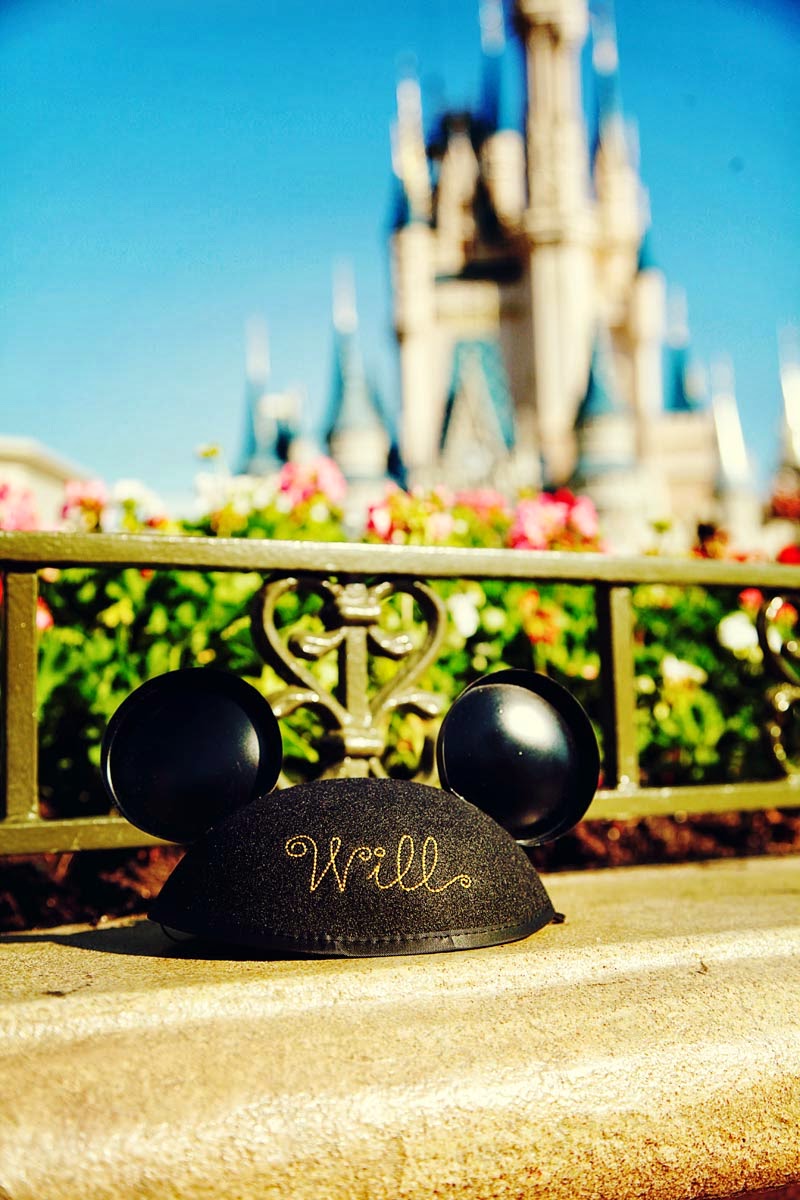
 
3. Look for places off the beaten path. World Showcase at Epcot is a treasure trove of photo opportunities. There are tons of places to get great photos that don't necessarily scream "taken at Disney World." My favorite spot is the Morocco pavilion, underneath the archway and around the hidden fountain just to the left. Asia land in Animal Kingdom has lots of interesting walls and doors that provide a great texture for your images. In Magic Kingdom, use the castle wall or the archways in the entrance to New Fantasyland to create a classic look.


4. Meet the characters. Who doesn't love a classic photo with Mickey? Depending on how far along you are in your pregnancy, you can even get the characters to help you reveal the gender to friends and family, or even make the big announcement that you are expecting. If you plan to do that, be sure to bring a sign or something that makes your announcement, then just ask the character to hold it in your photo.
 
5. Posing. When doing maternity portraits, I always ask my clients to place at least one hand on their belly in every shot. This draws attention to the very purpose of the photo. You can place one hand on the top of your bump and the other underneath, or just one hand in either location. Also remember to take some shots that are just of the belly, keeping your back all the way to one side of the frame (like we did in the first image on this post). Leaning against a wall is a great classic pose that is very flattering to most anyone. Take a step or two away from the wall and lean back so that your shoulder blades (and not your entire back) are touching the wall. Take the foot that is farthest away from the camera and step in back toward the wall, letting your knees bend slightly. Keeping your weight on that back foot gives you a slimmer figure and really shows off that gorgeous baby bump (See the black and white image above). One last thing: don't forget to take some photos where you are looking down at your belly. This too helps draw the viewer's eye to the focus of the image.
 
     I hope you can find these tips to be helpful on your trip. Don't be afraid of visiting the parks during pregnancy. If you and baby are healthy, there is no reason why you can't have just as much fun as you always do. I loved it so much, that I hope I am able to visit during any future pregnancies!
 

Friday, March 14, 2014

Booking a photo session with Disney Photography


     Many people don't realize (even I didn't until a couple years ago) that Disney offers one-on-one professional portrait sessions at the theme parks and resorts. Being a portrait photographer myself, I was super excited to book an anniversary/maternity session for my husband and I during our trip this week. We haven't had professional photos made in 7 years!
     Compared to what I charge for portraits (and what others charge in my area), these sessions are very expensive. However, we were so extremely pleased with our images and the entire experience that I would say it is well worth every penny.


Portrait Session Options
     There are two different types of sessions available: The Mini Portrait Session and the Enhanced Portrait Session. Each type offers different locations and pricing. Here's a closer look at each:

Mini Portrait Session
The Mini Portrait Session is the least expensive option. It is $150 (plus tax) and includes a 20-minute session at one of these Disney resort hotels: Polynesian, Grand Floridian, Beach Club, Art of Animation, or Animal Kingdom Lodge. (Theme park locations are not available for these sessions.) At the end of your session, you will sit down with the photographer and view the images on an iPad. You will also receive a flash drive of all the images with copyright releases. These images are straight out of the camera, with no editing whatsoever. If you know someone who can edit them professionally, this is definitely a great value. Here's a side-by-side comparison at the original Disney file and an edited version:

The number of images varies for each session, but ours ended up being about 72. However, there are several duplicates of each pose. In reality, after I edited them, we ended up with only about 20 different poses. While there is not time for outfit changes, you are welcomed to bring props and ideas. We had an ear hat personalized with our son's name that we used for some shots. The entire process, from shooting to viewing, takes about 30-45 minutes.


Enhanced Portrait Session
The Enhanced sessions are more expensive than the mini sessions. The $350 (plus tax) price includes a one-hour session at your choice of any of the resorts, or even Epcot World Showcase during certain times of the year. It also includes a 6x6 proof book and website posting with slideshow. Images from these sessions are professionally edited by Disney. In addition to the main photographer, there is also an assistant and professional lighting equipment present during your shoot. The downside with this session is that no prints or files (except the proof book) are included in the price. All that must be purchased extra. Disney offers four different print packages ranging in price from $75 to $300. You can also purchase large prints (size 11x14 to 24x30) from $120 to $275 each. It isn't listed on the website, but I have read from other Disney bloggers that a CD of the images is available for $100. Looking at Disney's pricing model, this seems extremely cheap so I'm not sure how true this actually is now.

What time should you schedule your session?The best time for a photo session (Disney or otherwise) is during what photographers refer to as "golden hour." This short window of perfect light only occurs during the morning at sunrise and in the evening just before sunset. Our session was at 8 a.m. and we hit morning golden hour perfectly! We were still at the hotel when the session after ours began around 9 and the lighting had already dramatically changed.

How far in advance should you book?
To get the best time slot at your preferred location, i
t's best to book at least 3 months in advance. If you are going during a busy time (such as Spring Break, summer, or Christmas), you will probably need to book much earlier. I had originally wanted a sunset time, but when I called to book (3 months before), the only availability at our choice resort was the morning slot just two days before the end of our trip. This also brings us to another reason to book early: You will want to do the session as early in your trip as possible (within one to two days of arrival). If you wait until the end of your trip, like we did, everyone will be tired and not in the mood for pictures.

What should you wear?
This can depend on your location, but generally keeping it simple is always the best way to go. Avoid shirts with large logos or writing, or very bright neon colors. Decide whether you want something casual or dressy and keep everyone's outfits in that style. Once you decide your location, look up photos of the area online to be able to see what colors would look best with your setting. We chose the Grand Floridian which is mostly white and rust colors. I decided on a navy dress for contrast, and my husband wore a white button down with khakis, which seemed to compliment the scenery well.

Which type of session is best for small children?
If you are planning a family session with small children, it may be best to do the Mini Portrait Session. As a children's portrait photographer, I can tell you from experience that a child's attention span for photos is very short. They will not be nearly as excited or interested in getting them done as you are. The 20-minute session is a perfect amount of time to get great images before the little ones start getting bored.

     I'll leave you with some more (edited) images from our session. If you want to see more examples at different locations, you can visit the Disney Fine Art Photography website and browse through their galleries.


Thursday, July 26, 2012

Capturing the Magic: Character Greetings

The first time your child meets their favorite Disney character is a moment you want to capture for years to come. Of course you're going to get that picture of everyone smiling and looking at the camera, but what about all those in-between moments?
The characters at Disney parks are always in the mood for playing, giving hugs and kisses, or telling a good story. There's more to a meet-and-greet than just the autograph book and the photo. It's all those other moments of laughter and smiles that you'll really remember, not just the "Say Mickey!" photo moment.

When I was younger, my parents were pretty good about capturing those candid moments on camera. If you look a the photos of my very first character greeting, you'll find the best shots aren't the ones of us looking at the camera, but are of me cowering on my mom's shoulder and refusing to let Tigger tickle me. We still laugh about how shy I was (it didn't take long before I got over that and was tickling right back :) on that first visit. Now, I have a great memory to share with my own children, especially if they're nervous about meeting anyone.
So when you're next in line to meet Mickey, or Belle, or Tink, or Goofy, remember to always keep the camera rolling (or clicking!) to capture every wonderful moment. I practiced this in February when my younger sisters-in-law were meeting all the characters for the very first time. They both wore their "1st Visit" badges every day, and the characters always noticed. It provided for some great memorable moments, like with Buzz and Woody:


Some tips for capturing these great moments:
  • Turn off your flash. Great moments are gone in an instant, and if your camera is too slow, you won't get the shot. Turning off your flash can help speed up your camera (it also saves your battery). However, if you are at an indoor meet-and-greet (like Buzz and Woody, Mickey, or Tinkerbell) you will probably need to turn your flash on since these areas tend to be a little darker. For outdoor greetings, you shouldn't need a flash.
  • Step back. Let the moment happen. The characters have their own  great ways of encouraging interaction. It may take a minute for the child to get over being starstruck, but the characters are super patient. By the time you leave, your kid will have a new best friend, and since you've been taking photos the entire time, you'll have great images of it.
  • Jump in! Don't forget to jump in the photos too! The characters love to interact with parents and adults as well as kids. February was my first trip being the "adult." I mostly tried to sit back and let the girls have the spotlight and enjoy their first visit, especially with the characters. But I quickly learned that the Disney gang was not going to let me be ignored. Both Brandon and I were literally pulled in by the characters more than once (I didn't need to much prodding though! :). It made the girls laugh and made more great memories for us.
  • Badges. If it's someone's birthday, anniversary, or first visit, make sure you ask a cast member about getting a celebration badge that let's everyone know you're celebrating. If you stay at a Walt Disney World Resort hotel, you'll probably be asked at check-in what you are celebrating. Even if you're not celebrating anything specific (like we usually are), you'll still get an "I'm Celebrating" badge. You can write anything you want on these badges. For example, in February I celebrated my 15th WDW visit, but they don't make badges for that, so a super sweet cast member made one for me from an "I'm Celebrating" badge. When I met Peter Pan an few minutes later, he noticed and commented on it. (By the way, meeting characters is awesome, no matter how old you are. This was the first and only time I've ever met Peter, and I was so EXCITED! He was awesome!)

Every Disney character is unique. They each have brilliant personalities (which has made them so successful for so long), that always shine through when you meet them. Over time you begin to feel like you know them. Like I know that Goofy loves to tickle, or that Minnie will blow me a kiss when we say goodbye, and Mickey will always give the BEST hugs.
I'll leave you with one of my favorite images of my sister-in-law Ashley and Mickey. This is one of those moments that she'll treasure for years to come, and I'm so glad I was able to capture it for her.

Until next time, keep shooting!


Tuesday, July 24, 2012

Capturing the Magic: Tips for Photographing Fireworks

The firework displays at Disney are unlike anywhere else. They are AMAZING!! Once you've seen these wonderful shows like Wishes at Magic Kingdom or Illuminations at Epcot, other firework celebrations just can't hold a candle. These awesome pyrotechnics are also one of the most photographed attractions in the parks. But capturing that perfect burst of magic into a great photograph is not always as easy as it sounds.
Fireworks are some of the hardest things to photograph for a number of reasons. The bursts are bright and the sky is black, giving a harsh contrast that can make capturing the color of the burst a big challenge. Because the bursts happen so quickly, it's also virtually impossible to "freeze" the action, as most people would like. At Disney, there are aslo other obstacles, like crowds. Ever had the perfect vantage point, and then at the last minute some tall person comes and gets right in front of you? (That's why I always recommend getting your spot at least 30 minutes to an hour before the show starts to make sure you have a great view.) So with all these things working against you, how do you get images like this?:

Photography is a lot like baking a cake. It all starts with the right ingredients (or in this case camera gear :). For firework photography the basic gear includes:
  • a DLSR camera and lens (not that you can't get great shots with a point-and-shoot, but these tips work best with SLR camera types)
  • a tripod (It doesn't have to be a big one. I use a Gorillapod. It's light and fits in a small bag [or big cargo pocket] and bends to wrap around poles or other objects.) If you don't want to carry a tripod, you can also rest your camera on a garbage can to keep it still.
If you want to try a little more advanced technique, you can also use:
  • a neutral density filter (this makes a BIG difference, but is not absolutely necessary. I forgot mine one night, and still got some nice shots.)
  • a remote shutter release (also great, but not completely necessary. I didn't use one at all on my last trip.)
Once you find a great spot (I prefer being next to a light pole or garbage can. They are great places for a small tripod or none at all), and get your camera in place, it's time to adust your settings.
**Location Tip: At Magic Kingdom I always get a spot at the hub (near the Walt and Mickey statue) or somewhere along Main St. The upper level of the train station is also great. At Epcot, there are great views from the Japan pavillion on World Showcase, or my favorite spot (which makes for an easier exit after the show) is right in the middle of the Future World side of the lagoon, next to the gift shop.**
There are two different ways you can try shooting. One lets the camera do half of the thinking for you, and the other gives you complete control over the camera settings. If you're new to photography, or if you just want to take better vacation photos, the semi-automatic way is great. I used this technique for this photo of Illuminations:


For the Semi-Automatic technique:
  •  Turn your camera's dial to the Tv mode. This mode allows you to control the shutter speed (how long the image is exposed) while the camera worries about the aperture (the size of the opening that lets in the light).
  • Set your ISO to 100 or 200. This keeps the images from being grainy or noisey in the darker areas.
  • Keep your shutter speed 1/60 and lower. Using a slower shutter speed allows you to capture more of the trails of light from the bursts, and also allows you to capture more bursts in one shot. Speeds like 1/40 and 1/30 will give you more of a streaking look than a speed of 1/60 or 1/80 would. Try various speeds and find what you like best.
For a more advanced technique (like the one I used for the first image of Wishes) you'll need to:
  • Turn your camera's dial to Manual (M) or Bulb (B) mode. This will allow you full control over all settings, both shutter speed and aperture. If your camera doesn't have a Bulb mode on the dial, go to Manual and then change the shutter speed until it reads "Bulb." Bulb means the shutter will stay open for however long you hold the button down when you take a shot.
  • Set your ISO as low as it will go (100 on most cameras).
  • Keep your aperture between f8.0 and f11.0 for most of the show. For the finale, you may want to try a smaller aperture (maybe f18 or f22).
  • Hold the shutter open for 6 to 8 seconds. As the finale begins, or anytime several bursts explode one right after another, try longer shutter speeds like 15 or 20 seconds. If you use a neutral density filter, you can hold the shutter open for longer periods of time, allowing you to capture more bursts if you want. It also helps capture more of the colors.
No matter which technique you use, it's vitally important to keep your camera still and steady. With the semi-automatic technique, it is possible to hand-hold the camera if you have a very steady hand (that's what I did in the earlier photo). But anytime you can prop the camera (or yourself if you're shooting hand-held) will help your photos be less blurry and capture more definition in the bursts.
I hope these tips help capture more of the Disney magic in photographs. If you have any questions, please comment and I'll be happy to answer. To see more of my Disney World photography, check out the Road Trip gallery on my website at www.imaginationphotog.com. And look for more photography tips coming soon!

Miranda


P.S. I didn't just make this up. I learned a lot from the amazing photographers on the Disney Photography Blog. Check out their site in my Links section!

Wednesday, July 6, 2011

Disney Photography [101]: Camera Gear

Hey again gang! I've been trying to upload this for-ev-er. Blogger has been so grouchy about uploading my videos lately, but I've finally found a way to get it here. This is the first of what will hopefully be many videos giving you Disney World photography tips. I've been dropping little photo nuggets throughout my blogs, but now I decided to take it a step further.
I'm a big fan of YouTube tutorial and how-to videos, and I noticed there were none (at least that I could find) that really gave any Disney vacation advice, photography or otherwise. So I thought, why not? I could post all this in a written blog I suppose, but some things are just better explained in person. This first one is just sort of an introduction to what camera gear I bring with me to the parks. More specific tips will follow.
I hope this helps and you guys enjoy :)!